Guild - Basic Info
Category
- [Guild] is a group of saviors organized under Knight Commander Uska’s official admission.
- If you join the [Guild], you can participate in guild contents by upgrading the guild level and you can also overcome hazards you face in-game with guild members.
- If you are in the [Guild], you can open the Guild Information window by pressing [Alt + G] or by the marked icon below.

1. Create Guild
- You can create a guild from Lv. 400 regardless of the class.
- Go to Templar Master [Knight Commander Uska] NPC in Klaipeda to create a guild.

- 1,000,000 silver is consumed when creating a guild.
- Basic number of guild members is 50, but you can expand the number with Guild Attribute Point.
2. Disband Guild
- Guild master can right-click on the guild member on the list to disband the guild.

- You cannot disband a guild while you are at war.
- You have to banish every guild member to disband the guild.
- No cooldown is applied when creating a new guild. (you can create a new guild right after disbanding the guild.)
- When you re-create the guild after disbanding the guild, the guild level and exp are all reset.
3. Transfer Guild
- The position of Guild Master can only be passed on within the Guild Hangout that can be moved via Guild Tower.

- Right-click on the guild member and click [Transfer Guild Master Position] to transfer your position.
- The position of Guild Master cannot be transferred for 7 days.
4. Role and Authority
- Guild Master can add roles and apply roles to the guild members.

- Write the name of the role and press add to add the roll.

- Select the role you wish to apply to the guild member and press save to apply the role.
- Guild master can apply authority about guild management, funds, community, PVP, contents or so to the guild members.
- Multiple authorities can be applied to one role.
- You can apply authority by 1) select the role, 2) select the authority to apply, 3) press save in Role Settings.
- Some contents may be unable to play if you don’t have the authority.
|
Category |
Authority |
|
Guild Management |
- Accept Application |
|
Guild Funds |
- Deposit Guild Funds |
|
Guild Community |
- Write Announcement |
|
PVP |
- See ongoing Wars |
|
Contents |
- Start Guild Quest |
|
Housing |
- Decorate Hangout |
5. Guild Tower
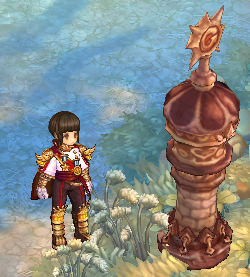
- Guild Tower is for the guild contents.

- You can purchase ‘Guild Tower’ item from the Templar Master. (100,000 silver)
- If you right click on the Guild Tower item on the field, it will be installed in the spot where you used the item. (unable to install guild tower near the NPC)

- The location of the installed guild tower can be checked from Guild Information window (Alt + G).
- Installed guild tower remains for 7 days, and disappears when expired.
- Every guild member can install guild tower.
- Only 1 guild tower can exist at a time. If you install the guild tower, the existing guild tower will disappear.
6. Guild Level

- When the [Guild Level] increases, contents for guild will be added and 1 [Attribute Point] to learn [Guild Attribute] will be given.

- Click [Upgrade Guild] from [Guild Tower] and use [Talt] and [Guild Quest Reward Coin] to increase the [Guild Level].
|
Item |
How to Get the Item |
|
Talt |
- Cube from Instance Dungeon Reward |
|
Guild Quest Reward Coin |
- Reward for Guild Quest |
- The EXP increases when you put the item and press [Upgrade Guild].

- You can level up the attribute from [Guild Attributes] in [Upgrade Guild] menu.
- Guild Attribute Reset Voucher can be purchased via ‘Guild Hangout Manager’ NPC in Guild Hangout by 2,000 points of Guild Mileage.
- When you use the Guild Attribute Reset Voucher, ‘Taming’ and ‘Farming’ attribute can be reset among 3 attributes. Only the guild master can purchase/use the item.
- Following contents will be added when the guild level increases.
|
Guild Level |
Additional Content |
|
1 |
Basic level when creating the guild |
|
2 |
Guild Hangout |
|
3 |
Able to use Reduce Craft Time function |
|
4 |
Additional Guild Quest - Guild Boss Raid: Defeat Rocktortuga |
|
5 |
Additional Guild Quest - Guild Mission: Gele Plateau |
|
6 |
Additional Guild Quest - Guild Boss Raid: Defeat Bebraspion |
|
7 |
- |
|
8 |
Able to use Shared Guild Storage - Liberate Shared Guild Storage when clearing Guild Quest for 12 times or more Additional Guild Quest - Guild Boss Raid: Defeat Colimencia |
|
9 |
- |
|
10 |
Guild Hangout expansion to Lv.2, Lv.3 Additional Guild Quest - Guild Boss Raid: Defeat Kirmeleech - Guild Mission: Mage Tower |
|
11 |
- |
|
12 |
Guild Hangout expansion to Lv4, Lv.5 - Certain amount of Guild Fund and Mileage is needed. Additional Guild Quest - Guild Boss Raid: Defeat Cactusvel |
|
13 |
- |
|
14 |
Additional Guild Quest - Guild Boss Raid: Defeat the Kurmis |
|
15 |
Additional Guild Quest - Guild Mission: Roxona Underground Facility - Guild Mission: Sulivinas Lair |
|
16 |
Additional Guild Quest - Guild Boss Raid: Defeat Riteris |
|
17 |
Additional Guild Quest - Guild Boss Raid: Defeat Pantorex |
|
18 |
Additional Guild Quest - Guild Mission: Mishekan Forest |
|
19 |
- |
|
20 |
- |
7. Guild Mileage
- Guild Mileage is given when you play guild content.

- You can see the Guild Mileage via [Hangout Info] or [Shared Storge] menu in the Guild Information window (Alt+G).
|
Usage |
How to Use |
|
Shared Guild Storage |
- When you Deposit/Withdrawal from Shared Guild Storage, 20 mileage will be deducted. |
|
Guild Hangout Housing |
- You can exchange Guild Mileage into Guild Housing point to purchase items. |
- Guild Mileage can be collected by following.
|
From |
Amount |
Note |
|
Daily Login |
3 |
- |
|
Party Contents : Clear Challenge Mode Stage 5 or above |
1 per clear |
- Mileage from party contents is by each guild member (max. 100 weeky) - Total amount resets every Monday at 6 AM. |
|
Party Contents : Clear Legend Raid |
4 per clear |
※ Guild Mileage is based on team.
8. Guild Contribution
- You can purchase items by using Guild Contribution via [Guild Hangout Manager] NPC, or you can exchange the Contribution into Mileage to purchase Guild Hangout items.

- You can see the Contribution in [Hangout Info] via the Guild Information window (Alt+G).
- Guild Contribution can be received by following.
|
Contents |
Individual Contribution |
|
Participate in GTW |
200 |
|
Participate in Guild Quest |
30 |
|
Guild Upgrade |
- Differs by the contribution on the upgrade - Attribution Rank is set according to the contribution, and the rank can be checked from the [Upgrade Guild] menu. |
|
Deposit Guild Funds |
- When you put 5,000 silver or more, 1 contribution point per 5,000 silver will be given |
|
Participate in a Guild Hangout Raid |
- The higher guild level and Contribution level, the more Guild Contribution Points will be given |
※ Guild Contribution Points is based on team.
9. Guild Fund
- Guild Fund is used for [Change Guild Emblem] or [Guild Hangout Expansion].

- You can deposit or see the Remaining funds by Guild Information window (Alt+G) - Storage - Guild Funds.
- You need authority to deposit the Guild Fund.
- Once you deposit the fund, you cannot undo the action.
- You can get 1 Guild Contribution Point per 5,000 silver.