Guild Territory Wars
Category
How To Play
Concept
Guild Territory Wars (GTW) are a guild-oriented PvP game mode where guilds can battle each other to seize one of the game’s Spot Area maps. Winning at GTW comes with special perks and benefits which cement your guild’s influence and prestige.
Schedule
GTW sessions happen every Sunday on the following schedule.
|
Server Region |
Start |
End |
|
[NA] Klaipeda |
EST 20:00 |
EST 21:00 |
|
[SA] Silute |
EST 18:00 |
EST 19:00 |
|
[EU] Fedimian |
EST 14:00 |
EST 15:00 |
|
[SEA] Telsiai |
EST 07:00 |
EST 08:00 |
Participation
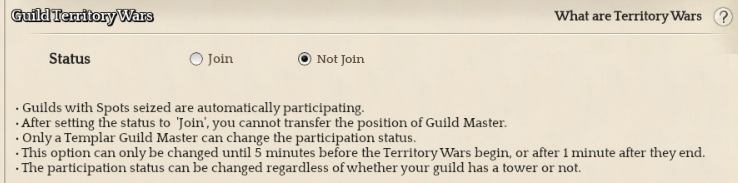
If your guild wants to participate in GTW, the guild master can change your participation options under the combat tab of the Guild window.
Note:
- Participation options can be changed by the guild master only.
- If participation is set to ON, the guild master cannot transfer their position to another member.
- Participation options cannot be changed from 5 minutes before a GTW session starts to 1 minute after it ends.
- If your guild is participating in GTW, joining, abandoning and disbanding the guild will not be possible during the session.
- Members who abandoned their previous guild less than 14 days in the past cannot participate in GTW sessions.
Spot Areas
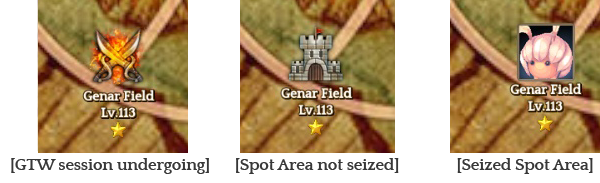
Spot Areas are the game maps your guild can try and seize during a GTW session. There are three Spot Areas available in the World Map.
|
Spot Areas |
Connected Maps |
|
Genar Field |
Altar Way |
|
Manahas |
|
|
Pilgrim Path |
|
|
Aqueduct |
Tenants' Farm |
|
Myrkiti Farm |
|
|
Demon Prison District 1 |
|
|
Greene Manor |
|
|
Baron Allerno |
Tenants' Farm |
|
Gytis Settlement Area |
|
|
Myrkiti Farm |
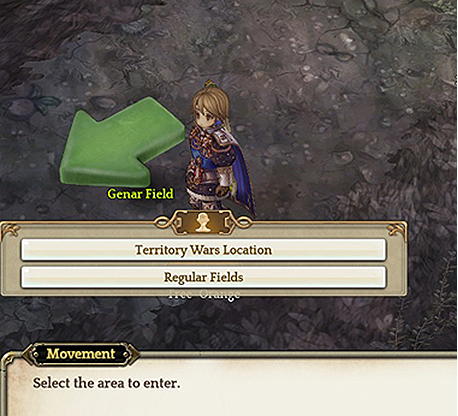
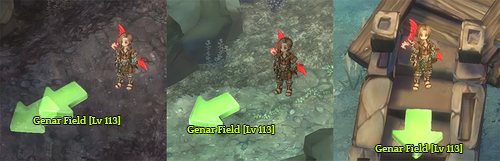
To enter a Spot Area during a GTW session, use the green arrows in connected maps and select the ‘Territory Wars Location’ option.
GTW Rules
1) Start
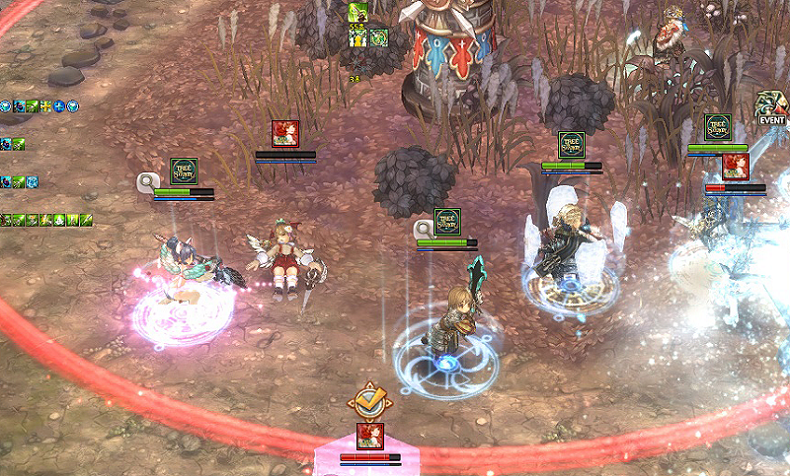
Once the session starts, all members of the participating guilds are allowed to enter the Spot Areas. Inside these maps, PvP combat is always available among competing guilds.
Note:
- Some items and skills are restricted inside the Spot Areas.
- Save for a few select classes, summoning and mounting Companions is not available inside the Spot Areas.
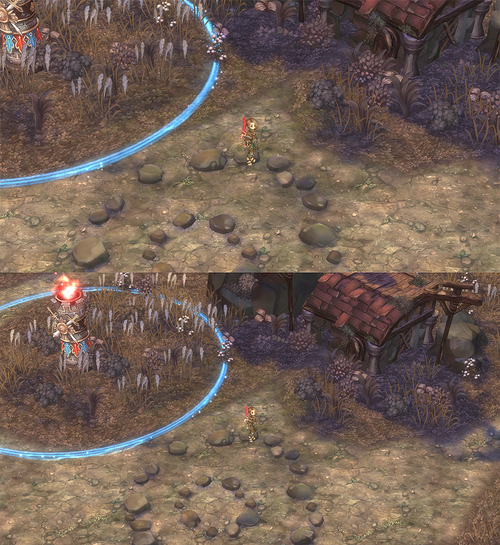
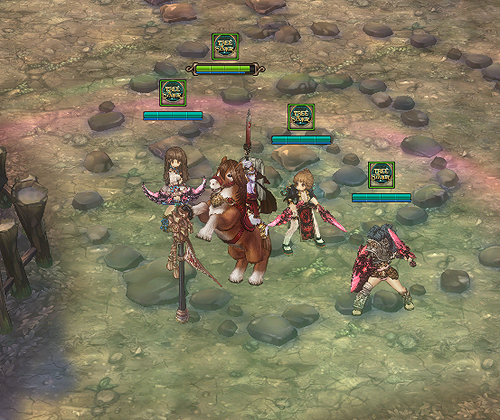
2) Seizing a Spot
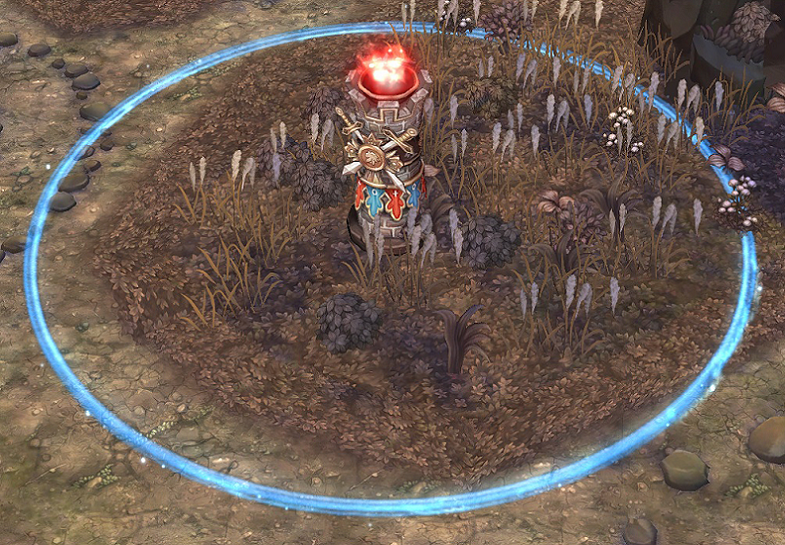
Inside each Spot Area there is a Territory Tower, around which guild members can either gain points or make the attacking guilds lose points. You can also gain points by destroying the Amplifiers that spawn around the map.
2.1) Gaining Points
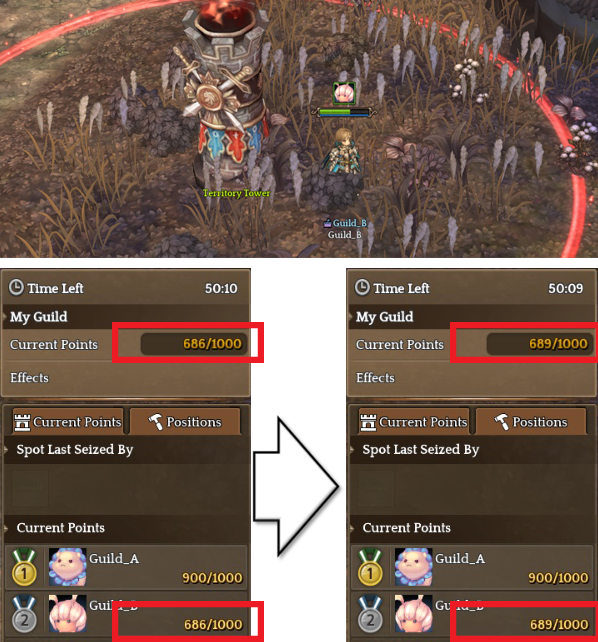
Members of attacking guilds (those trying to seize the Spot) can stand within the Tower perimeter to gain points for their guild. The number of points gained per second depends on the number of guild members around the Tower.
|
No. of guild members |
1 member |
2 members |
3 members |
4+ members |
|
Points gained per sec |
3 |
5 |
7 |
9 |
When your guild reaches 1,000 points, you seize the Spot! If more than one guild reaches 1,000 points at the same time, the points will no longer accumulate until only one guild remains.
2.2) Reducing Points
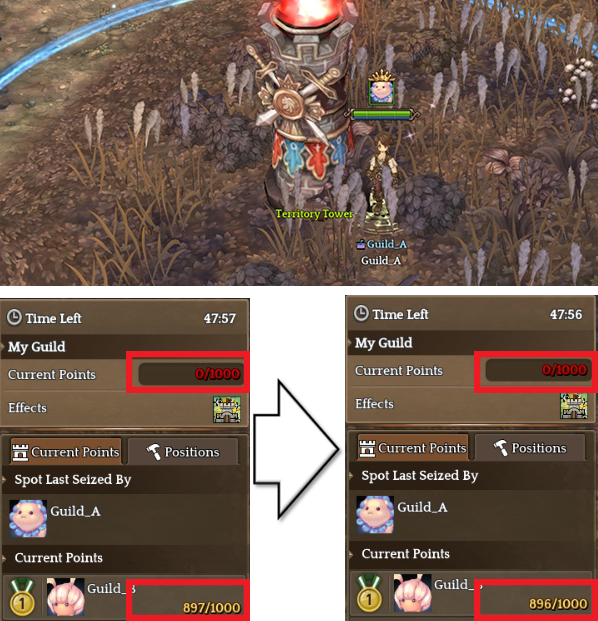
Members of the defending guild (the one currently holding the Spot) can stand within the Tower perimeter to reduce the points of the attacking guilds. The number of points reduced per second depends on the number of guild members around the Tower.
|
No. of guild members |
1 |
2 |
… |
9 |
10+ |
|
Points reduced per sec |
1 |
2 |
9 |
10 |
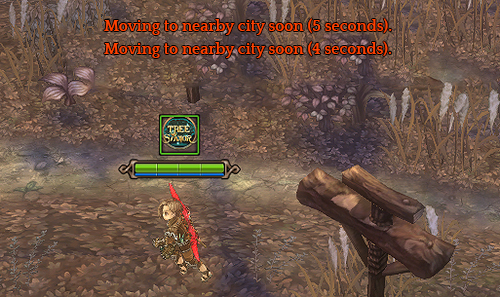
3) Spot Seized
Once a guild succeeds in seizing a Spot, members of the other guilds are automatically sent to a nearby city after 5 seconds. The guild that holds the Spot by the end of the session can enjoy beneficial buffs within the Spot Area, with buff effects stacking according to the total amount of time that the Spot is held.
|
Buff name |
Effects |
Duration |
Note |
|
Guardian |
-20% damage received (additional -5% per stack) |
For as long as the same guild holds the Spot |
Max. 3 stacks |
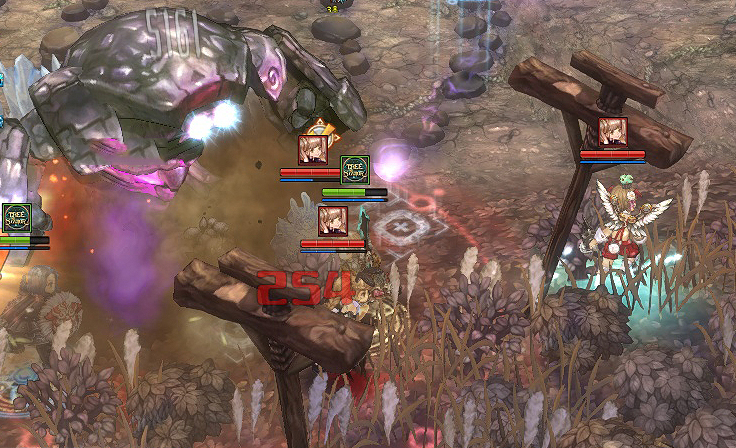
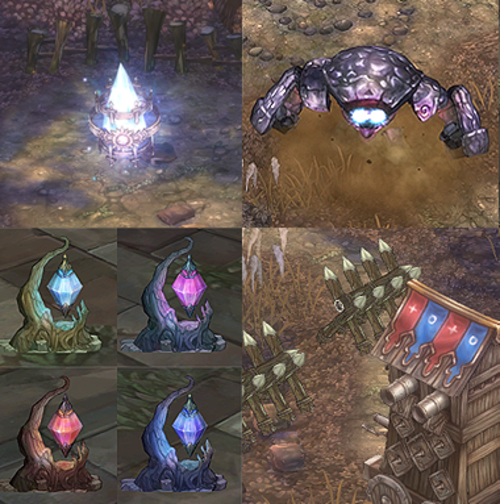
Territory Amplifiers
Territory Amplifiers are devices that spawn around a Spot Area. When an Amplifier is destroyed, the guild that dealt the last blow can receive +200 points and a beneficial buff effect. Amplifiers can be destroyed by both defending and attacking guilds, with the latter receiving both the points and the following effects.
|
Buff name |
Effects |
Duration |
Note |
|
Damage and Movement Speed Increased |
Damage +30% |
5 min |
Does not stack |
Note:
- Each Spot Area map produces a maximum of 5 Amplifiers.
- The effects apply only inside the Spot Area map, and they disappear if a new guild seizes the Spot.
- Amplifiers appear 8-10 minutes after the beginning of the session. If one is destroyed, it respawns after 8-10 minutes.
- An alert message appears in the Spot Area 30 seconds before an Amplifier is generated.
- Amplifiers will no longer be generated starting 10 minutes before the end of the session.
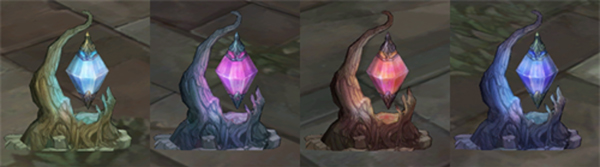
Tree Root Crystals
Different types of Tree Root Crystals are randomly generated within the Spot Area. Each type gives you a different beneficial effect, according to its function.
|
Type of Crystal |
Effects |
Duration |
|
Speed (Blue) |
Greatly increases movement speed |
5 sec |
|
Regeneration (Pink) |
Instantly restores 30% HP and SP, |
30 sec |
|
Attack (Red) |
Increases damage dealt and taken by 50% |
30 sec |
|
Defense (Purple) |
Reduces damage taken and dealt by 50% |
30 sec |
Note:
- If you are already under the effect of one Crystal, other Crystal effects will not apply (the effects do not stack).
- Buff effects disappear if your character becomes incapable of combat.
Boss Monsters
At certain times during the session, a boss monster will appear in the Spot Area map. The guild that deals the last blow to it gets a special buff within the map.
|
Buff name |
Effects |
Duration |
Note |
|
Thick Skin |
-30% damage received |
5 min |
Does not stack |
The first boss monster appears 10 minutes after the start of the session, then it reappears 10 minutes after it is defeated.
GTW Items
The Expedition Merchant NPC in your Guild Hangout sells GTW-exclusive items you can use strategically during the session (these can be used only inside Spot Areas, except for the Warp Scroll).
|
Item |
Icon |
Description |
|
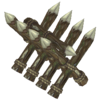
Wooden Barricade |
|
- Keeps attacking guilds from trespassing for 600 seconds. |
|
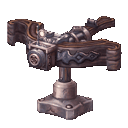
Ballista |
|
- Shoots one or multiple damaging arrows at enemy guild members within range for 600 seconds. |
|
Siege Tower |
|
- Structure you can ride while attacking enemy guild members and objects for 600 seconds. |
|
Divine Flag |
|
- Lets you teleport to the location where the flag is planted for 180 seconds. |
|
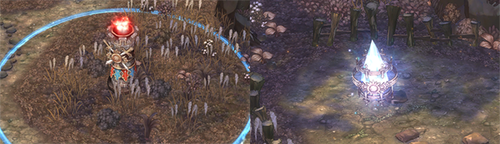
Mysterious Crystal |
|
- Revives you when you become incapable of combat inside the Spot Area. |
|
Wide Regeneration Scroll |
|
- Revives all guild members currently incapable of combat within the Spot Area with 50% of their HP and SP restored. |
|
Warp Scroll - GTW |
|
- Transports you to a Spot Area. |
|
Recon Map |
|
- Reveals the location of all members of the defending guild within the current map for 5 seconds. |


Note:
- Squires, Alchemists and Pardoners can repair installed items.
- These items cannot be installed near the Territory Tower or Amplifiers.
- Mysterious Crystals and Wide Regeneration Scrolls cannot be used near the Territory Tower.
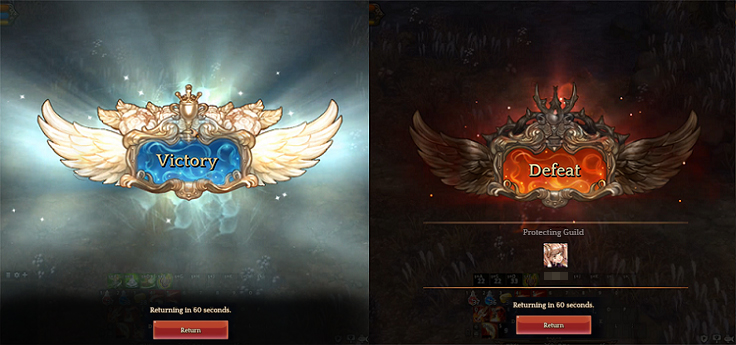
Final Moments
At the end of the session, the last guild to have seized the Spot is declared the winner, and the Spot Area closes after 1 minute.
The winning guild will appear on the World Map as the owner of the Spot Area until the beginning of the next GTW session.
Rewards
Honor Rewards
Five minutes after the end of the session, members of the winning guild can retrieve the following honor rewards at the Expedition Merchant NPC in the Guild Hangout, according to the Spot Area seized.
|
Spot Area |
Rewards |
|
Genar Field |
Black Champion Costume |
|
Conqueror Armband |
|
|
Aqueduct Bridge Area |
Black Champion Costume |
|
Baron Allerno |
Black Champion Costume |
Note:
- These rewards can be collected until the start of the next GTW session.
- The items will include a time limit according to how much time is left until the next session.
Tariff Collection
After the end of each GTW session, the winning guilds can accumulate and collect tariff funds from cities and the Market, according to the Spot Area seized.
1) City Tariffs
Each Spot Area corresponds to a city where local tariffs can be adjusted by the owning guild. The higher the tariff rate, the larger the amount collected. Here is the list of cities and the Spot Areas they correspond to.
|
Genar Field |
Baron Allerno |
Aqueduct Bridge Area |
|
Klaipeda |
Orsha |
Fedimian |
Each guild can adjust their city’s tariff rates under the GTW benefits section of the Guild window (combat tab).
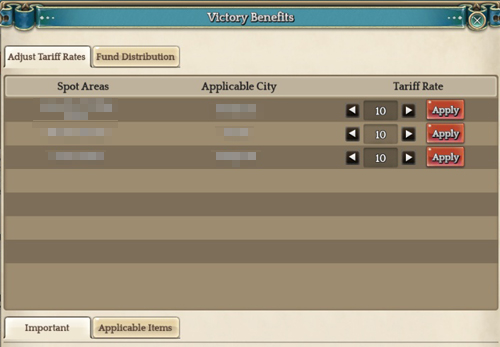
The automatic default rate is 10%, and you can adjust it to any number between 0% and 20%.
Note:
- City tariff rates can be adjusted only by the guild master or members with the corresponding authority.
- After adjusting a rate, it can only be adjusted again after 1 hour.
- Rates cannot be adjusted from 1 hour before the start of a GTW session until 5 minutes after it ends.
- If a Spot Area’s owning guild changes after the end of the session, the corresponding city’s tariff rate resets to the default (10%).
- No tariff rates (0%) apply to members of the owning guild within the corresponding city.
When the standard rate of 10% is applied to a city, regular players see no change to their Silver spending, compared to how much they would spend before this system was introduced. The change happens when the rate is set below or above 10%, which in turn reduces or increases Silver prices (and the amount accumulated for the owning guild) accordingly.
Since the standard is 10%, if a guild applies a tariff rate of 0% (minimum rate) to their city, a transaction that would normally cost 10,000 Silver will now cost 10% less (9,000 Silver) to any regular player, and the amount accumulated for the owning guild from that transaction will be 0.
At a tariff rate of 10% (default rate), a transaction that would normally cost 10,000 Silver will continue to cost 10,000 Silver for a regular player, with 10% of that amount (1,000 Silver) accumulated as part of the tariff for the owning guild.
If the guild has set a tariff rate of 20% (maximum rate), a transaction that would normally cost 10,000 Silver will now cost 10% more(11,000 Silver) for a regular player, with 20% of that amount (2,000 Silver) accumulated as tariff funds for the owning guild.
Tariff funds are accumulated starting 5 minutes after the end of the GTW session, until the end of the next session. These tariffs apply to Silver spent by players who are not members of the owning guild within the corresponding city in the following transactions.
Item Merchant: item purchases
Equipment Merchant: weapon and armor purchases
Accessory Merchant: accessory purchases
Companion Trader: companion adoption, companion food purchases, companion training
Blacksmith: repairs, recipe purchases, socket addition, gem extraction, identification, item dismantling, weapon appearance changes (if the potential loss prevention option is ON)
Storage: Team Storage expansions
Geraldas Family: gem purchases
Magic Association: item purchases
Fishing Manager: item purchases
Teliavelis: item purchases, seal enhancement
Appraiser Master: identification
Tariff rates do not apply to Silver spent in the following transactions:
- Warps
- Class-specific supply purchases
- Guild foundation
- Etchings
- Personal Storage transactions
2) Market Tariffs
Guilds who own a Spot Area can also receive a set percentage of the Silver spent on Market fees (both registration and sale fees). Funds accumulated through these tariffs are calculated on a weekly basis.
|
|
Genar Field |
Baron Allerno |
Aqueduct Bridge Area |
|
Market tariff |
4% |
3% |
3% |
Market tariffs apply starting 5 minutes after the end of a GTW session, until the end of the next session.
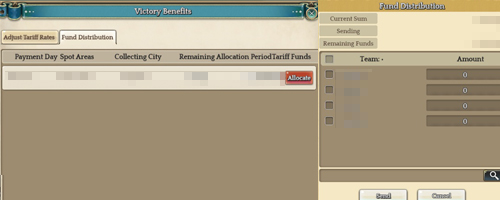
3) Tariff Fund Distribution
Accumulated tariff funds can be viewed under the GTW benefits UI (Guild window), and distributed to your guild members for one week after they are received. E.g. if the GTW session takes place on the 10th, tariff funds will accumulate for 1 week until the 17th, and they can only be distributed during the week after that (until the 24th).
Note:
- The amount designated as tariff funds includes both city and Market tariffs.
- The list will update 1 hour after the end of the GTW session.
- Only the guild master or members with the corresponding authority can distribute funds.
- Funds left undistributed one week after they are received will be automatically deleted and cannot be recovered.
- If the guild is disbanded, any funds left undistributed will be automatically deleted and cannot be recovered.
- All logs related to funds received and distributed are kept in the ‘Records’ tab.
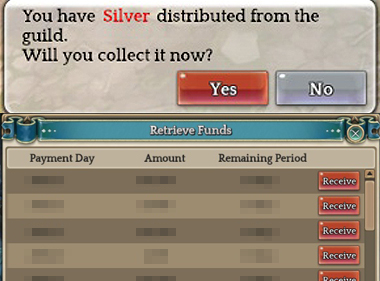
4) Retrieving Distributed Funds
Guild members who receive part of the funds when they are distributed will see an alert message appear on the screen that allows them to retrieve their allocated amount.
Note:
- The alert will appear to all of your characters for as long as you have funds left to retrieve.
- After the funds are distributed, you have 14 days to retrieve them (if not retrieved, the funds are automatically deleted and cannot be recovered).
- Retrieved funds are sent to the inventory of the character that receives them.
- If you abandon your guild, any funds left to be retrieved will be automatically deleted and cannot be recovered.
Strategies and Tips
Paths to the Spot Area
There are only three Spot Areas in total, but each of them is connected to multiple maps, which allows for different approaches to the battle.
Guilds can split and divert the attention of the enemy while the main forces carry on, or enter together for a combined attack.
Invincibility Buff
Upon entering a Spot Area, your character gains a temporary invincibility buff that lasts for 5 seconds unless you move, jump, or use a skill or basic attack.
This protects players when they are entering the Spot Area and allows guilds to move more systematically.
Expanded View
Your view is expanded within all Spot Area maps, meaning you can zoom out further than you would in regular maps.
This gives you a better perception of the full scale of the battle and lets you catch your enemy’s movements earlier.
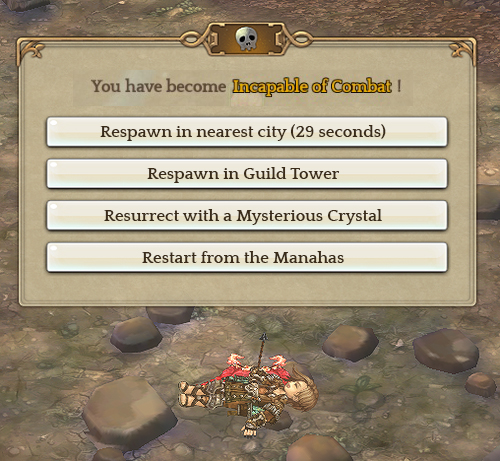
Respawning in GTW
After becoming incapable of combat inside a Spot Area, you have multiple options for how and where you can respawn.
|
Requirements |
Respawn Location Options |
|
(default) |
Goddess Statue in a nearby city |
|
Having a Guild Tower |
Guild Tower |
|
Having a Base Camp installed |
Squire Base Camp |
|
Receiving the effects of Resurrection |
On the spot |
|
Using a Mysterious Crystal |
|
|
Receiving the effects of a Wide Resurrection Scroll |
Using different respawn options makes combat generally more unpredictable, but it provides a good chance to turn the flow of the battle in your favor.
Seizing Strategies
Attacking guilds need to collect points in order to seize the Spot, and there are two ways of doing so. You can stay within the parameter of the Territory Tower and gain points per second according to your number of guild members on the Spot, or you can destroy one of the Amplifiers spread throughout the map to instantly gain 200 points.
The defending guild, on the other hand, can reduce the points of the attacking guilds every second by staying near the Tower. Ultimately, the advantage goes to the guild with the most organized reactions to both the combat by the Tower and the Amplifier situation.
Kicking Enemies to the City
When the Spot is seized during a GTW session, all members not of the seizing guild are kicked to a nearby city.
The new defending guild can use this time to place themselves inside the Spot Area according to their strategy, and attacking guilds can also prepare a new approach from the outside.
Tactical Elements in the Spot Area
There is a variety of tactical elements you can use inside the Spot Area.
|
Element |
Requirements |
Effects |
|
Territory Amplifiers |
Dealing the last blow |
+200 points |
|
Boss Monsters |
Dealing the last blow |
Damage taken reduced and immunity to knockback/knockdown |
|
GTW Items |
Using the item |
Installing combat objects and other beneficial effects |
|
Tree Root Crystals |
Dealing the last blow |
Different buffs according to the type of crystal |
Class Strategies
Every class has strong points that can give them an advantage in GTW combat. Here are some examples.
1) Templar
Templars are not just strong support characters in GTW, they are the best battle leaders.
Templar skills reach not just party members but guild members as well, so they are a valuable piece in keeping the guild strong and united.
2) Squire
Squires are a crucial part of team if your guild wants to target multiple Spot Areas at once.
When a Squire in your party installs a Base Camp, you can choose to respawn there if you become incapable of combat inside the GTW map. This allows you to quickly return to the battlefield or join the attack on a different Spot Area.
3) Scout
All Scout-tree classes can learn the Cloaking skill, which is extremely useful for assessing your enemy’s strategy.
Knowing in advance what your rivals are planning and how they are moving gives you a major advantage in battle.
4) Mounted Classes
Only some classes can summon and mount Companions inside Spot Areas.
One of the most decisive factors in the battlefield is mobility, so your guild’s mounted forces will always be an important part of the combat.
GTW Restrictions
The following is a list of restrictions that apply within all Spot Area maps.
1) Classes that can summon and mount Companions
- Cataphract
- Falconer
- Hackapell
- Hunter
- Lancer
- Schwarzer Reiter
- Templar
2) Restricted skills (cannot be used)
- Base Camp
- Briquetting
- Enchant Armor
- Equipment Maintenance
- Forgery
- Gem Roasting
- Identify
- Item Awakening
- Magnum Opus
- Oblation
- Portal
- Portal Shop
- Repair
- Spell Shop
- Switch Gender
3) Restricted consumables (cannot be used)
- Anvil (all kinds)
- Basic Warp Scroll
- Blue Orb (all kinds)
- Challenge Portal Scroll
- EXP Card (all kinds)
- Guild Tower
- Monster Card Album (all kinds)
- Popup Book (all kinds)
- Red Orb (all kinds)
- Skill Scroll (Barrier): restricted only within the Tower perimeter
- Soul Crystal
- Warp Scroll
Note:
- Elixir cooldown applies as 60 seconds.
- Dispeller and Omamori cooldown applies as 30 seconds.
4) Restricted buffs (can be used, but characters under these buffs will not count towards gaining/reducing points)
- Annihilation
- Burrow
- Cloaking
- Mijin no Jutsu
- Shadow Pool
- Stop