UI and Basic Info
Category
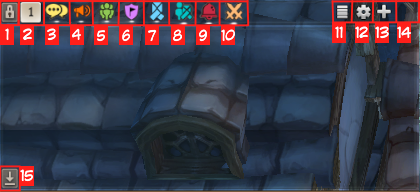
1. Basic Window

| No. | Name | Description |
| 1 | Character Info | Displays the team name, HP/SP, stamina, and character level. |
| 2 | Monster Info | Displays monster’s type, HP, level, and name. |
| 3 | Event Info | Click the icon to check the ongoing events. |
| 4 | Tutorial Mission | Click the icon to check the or receive rewards from the tutorial mission. |
| 5 | Channel Selection / Minimap | You can click on the window at the top to change channels and check the minimap. |
| 6 | Main Menu Icons | The main menu icons are displayed at the bottom. |
| 7 | Character / Class Levels | Displays the character’s current character and class levels. |
| 8 | Quickslot | Skills and items can be registered for quick use. |
| 9 | Chat Window | Displays chat messages. |
| 10 | Buff Window | Displays the buff effects that the character is under. |
2. Chat
(1) Basic chat UI
| No. | Menu | Description |
| 1 | Lock Chat Window | Locks the chat window in its current size. |
| 2 | Save Settings | Saves the chat window settings. |
| 3 | General | Displays the contents of general chat. |
| 4 | Shout | Displays the Shouted chats. |
| 5 | Party | Displays the chat between Party members. |
| 6 | Guild | Displays the chat between Guild members. |
| 7 | Whisper | Displays the 1:1 chat with another player. |
| 8 | Group | Displays the chat between designated chat groups. |
| 9 | System Message | Displays system messages. |
| 10 | Combat Message | Displays combat messages. |
| 11 | Chat List | Click to manage created or joined chat groups. |
| 12 | Chat Settings | Allows you to set up chat notifications and display settings. |
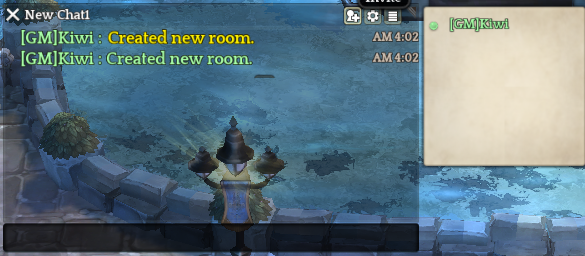
| 13 | Add Chat Window | Adds a new chat window. |
| 14 | Expand Window | Click and drag to resize the chat window. |
| 15 | Lock Scroll | Clicking on the button will make the chat window automatically scroll to the bottom when a new message is displayed. |
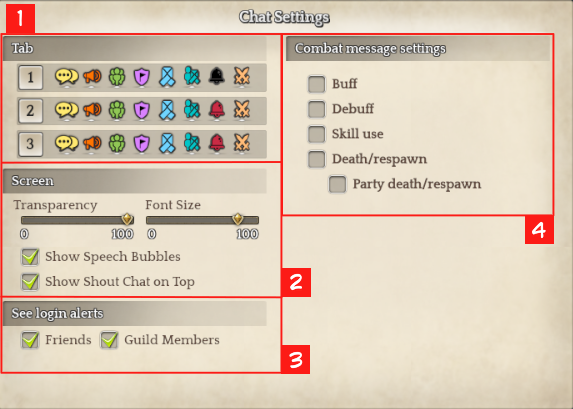
(2)Chat Settings
| No. | Menu | Description |
| 1 | Chat Display Settings | - Displays the saved chat display settings by number |
| - Only the chat for the icons that have colors will be displayed in the corresponding window. | ||
| 2 | Chat Window Settings | - You can set the transparency and font size of the chat window. |
| - Untick the box for chat balloons and speech balloons will not be displayed when players chat. | ||
| - Untick the box for shouts and players’ shouts will not be displayed on the top of the game screen. | ||
| 3 | Chat Notifications | Set notifications for when a friend or guild members connect to the game. |
| 4 | Combat Message Settings | Tick the boxes for combat messages that you want to have displayed or disabled. |
(3)Add Chat Window
- Players can have up to a maximum of 3 chat windows on display at once.
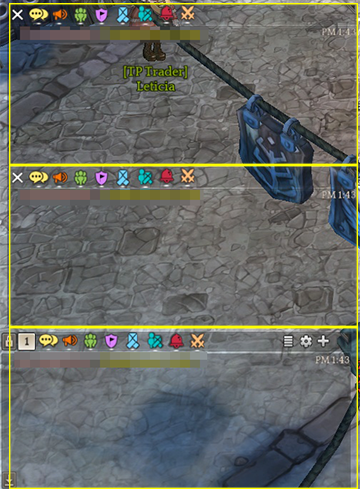
- You can have each chat window to display selected chat messages.
- Pressing Shift + Tab on your keyboard will let you switch between the different chat windows.
- You can resize all three chat windows.
(4)Creating Group Chat
- You can create up to 50 different group chats and the maximum number of people that can enter a group chat is limited to 20.
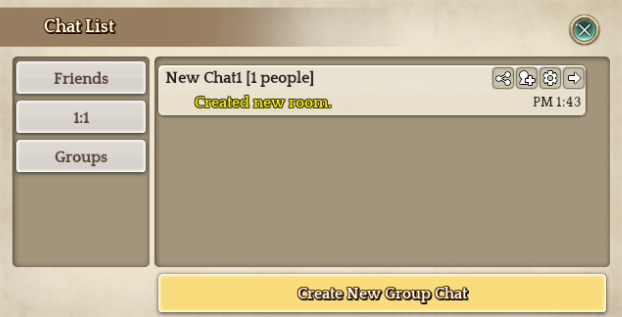
- You can send whispers in the 1:1 menu of the Group Chat UI.
- When you want to whisper a friend, you can do so in the Friends menu.
- In the ‘Groups’ menu, you will be able to use the following functions:
1)Insert Invite Tag  : Like with party invite tag, you can share your group chats to invite others.
2)Invite  : You can invite individual players by entering their Team Names.
3)Member List : You can check the list of players currently in the group chat and see their connection status.
- You can double click the top of the Group Chat window to minimize or open the window.
- Each Group Chat window can be customized to different settings.
| Command | Description |
| /s | General chat |
| /y | Shout |
| /p | Party chat |
| /g | Guild chat |
| /w TeamName | Send whisper |
- You can use various commands using [/command] to easily switch between different chats.
- Shouting will consume a [Megaphone] when used.
(6)Using Emotes
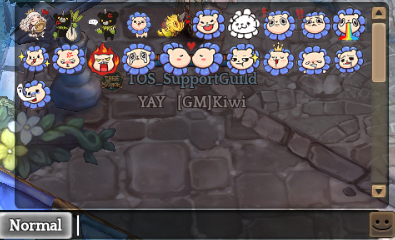
- Clicking on the [smiley icon] to the right of the chat window lets you use various emotes.
- Clicking on the emote to insert the selected emote into the chat window.
- You can add new emotes earned in the game to the available list of emotes.
- Right-clicking on the acquired emote from the inventory will add the new emote automatically to the list.
- Clicking on the [smiley icon] - [Motion] in the chat window lets you use motion emotes.
(7)Linking Item Info in Chat
- You can link item images and information into the chat by [Ctrl + Clicking the item].
- Clicking on the displayed icon image in chat will display the item information.
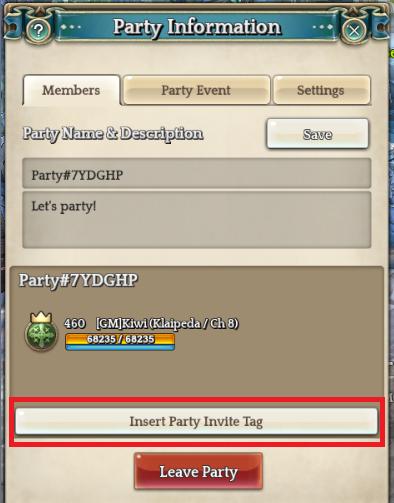
(8)Party Invitation Tag
- You can invite other players to the party by entering the [Party Invitation Tag] in the chat.
4. Map
(1) Mini Map
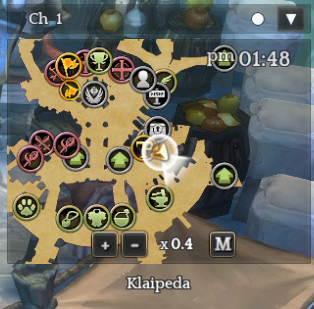
- The mini-map shows the current location of your character.
- You can click [+] to zoom in and [-] to zoom out the mini-map.
- Click the [M] icon on the mini-map or press the [M] key to see the name and full map of your current region.
(2) World map
-Press the [N] key to see the world map.
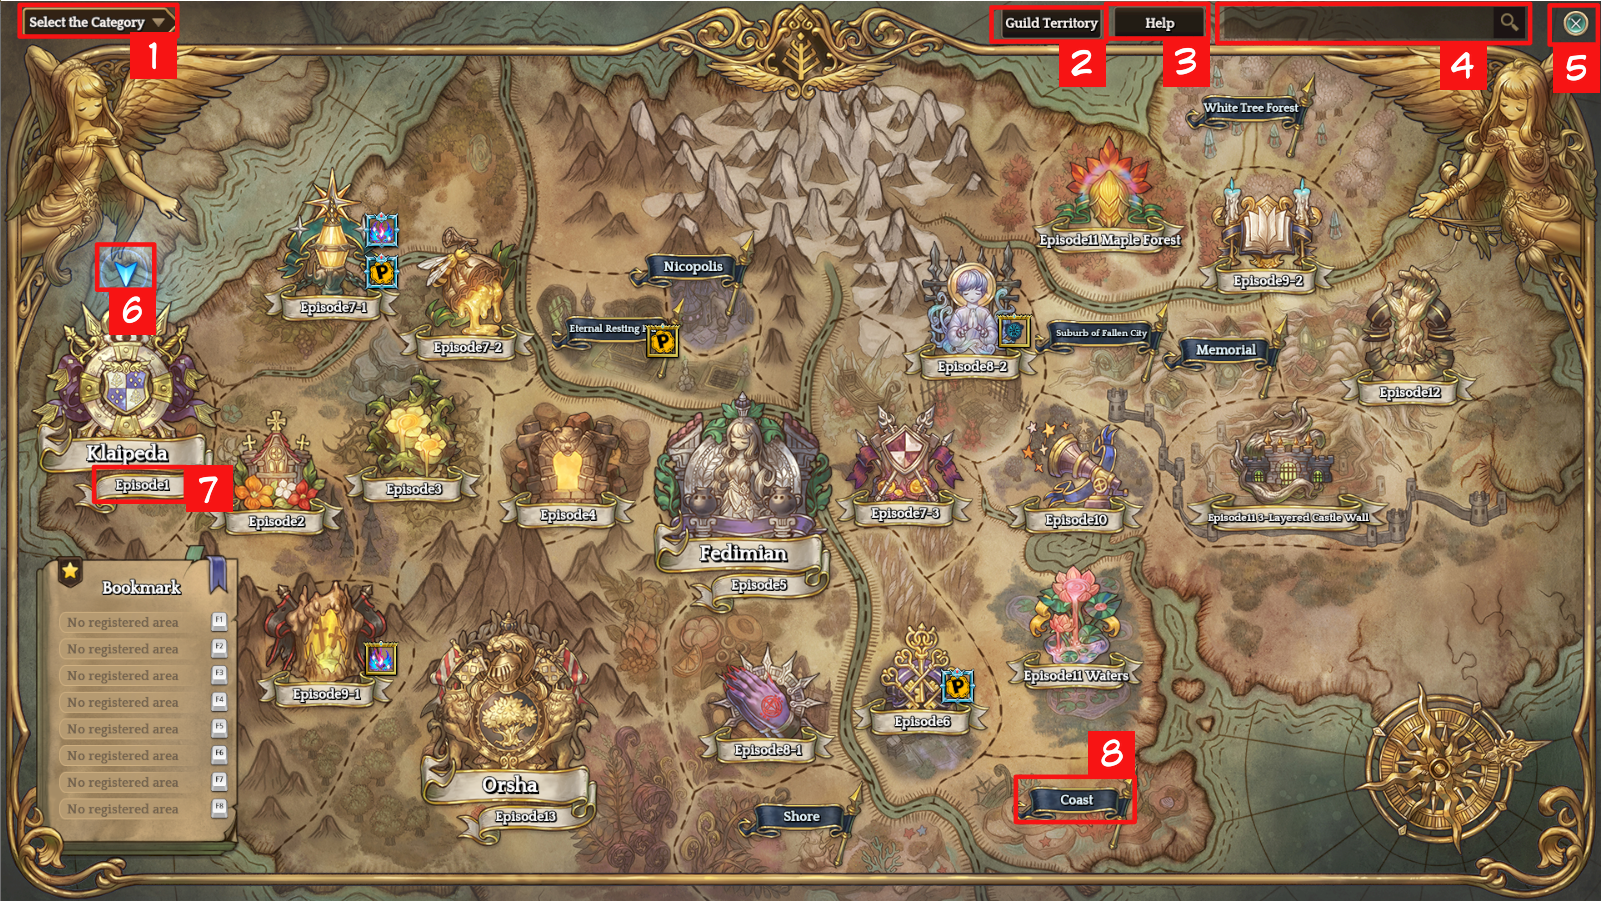
| No. | Description |
| 1 | Select the category.(World Map/Shortcut/Guild Territory/Previous Warp/Guild Tower) |
| 2 | Check the Guild Territory info. You can check the guild currently seizing the Champions/Challengers League. |
| 3 | You can check the Help to see more information about the World Map. |
| 4 | Enter the name of the region to find where it is located. |
| 5 | Click the X button to close the World Map. (Shortcut: ESC key) |
| 6 | Shows the current location. |
| 7 | Shows the Episode quest that takes place in the region. |
| 8 | Check the map of the normal regions. |
- Click the region to check the detailed information.

| No. | Description |
| 1 | Select it as a Bookmark by pressing the star button, and save up to 5. It is team-shared. |
| 2 | Check the Exploration Rate of the region. |
| 3 | Check the Quest/Monster/NPC info. of the region. |
| 4 | If you have the Token buff, you can use Token Travel to move to the selected region. |
- You must explore every place in the region to check 100% of the map.
- If the region hasn't been explored by the character, only the quests that can currently be proceeded will show.
※ You can only check quest with a level lower or Lv.10 higher than yourself.
5. Stamina
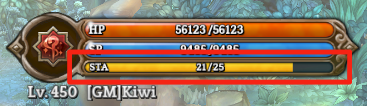
- The yellow bar in the upper-left corner of the screen represents your stamina.
- When you're low on stamina, your character cannot run and will walk instead.
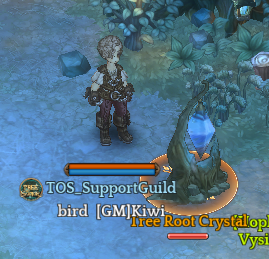
- Destroying the [Tree Root Crystals] spread throughout the fields can recover the stamina of your character and that of all characters nearby.
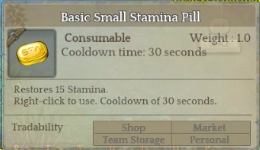
- Stamina can also be recovered by consuming [Stamina Pills], which are sold by Item Merchant NPCs in cities.
- Characters with Lv.200 or lower receive Movement Speed buff for 10 minutes when destroying the Tree Root Crystal.
| Level | Buff Effect |
| Lv.150 or lower | Movement Speed +3 |
| Lv.200 or lower | Movement Speed +1 |
- Press the arrow key in a row(→→) to Dash.
- Movement Speed increases by 10 and Stamina decreases by 0.5 when Dashing
- Stamina is consumed when the character jumps.
| Class | Detail |
| Swordsman | - Dash Movement Speed +10 - Dash is not removed when hit during Dash - Dash available when riding the Companion |
| Wizard | - Dash Movement Speed +6 |
| Archer | - Dash Movement Speed +10 - Dash is removed when hit during Dash |
| Cleric | - Dash Movement Speed +10 - Stamina consumed -50% when Lycanthropy: Human Form is applied |
| Scout | - Dash Movement Speed +13 - Stamina consumed +100% |
6. Goddess Statues
- In the game, you will come across statues of Goddess Vakarine and Goddess Zemyna.
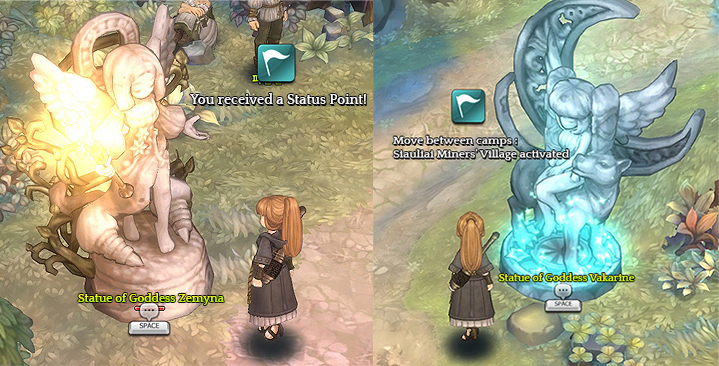
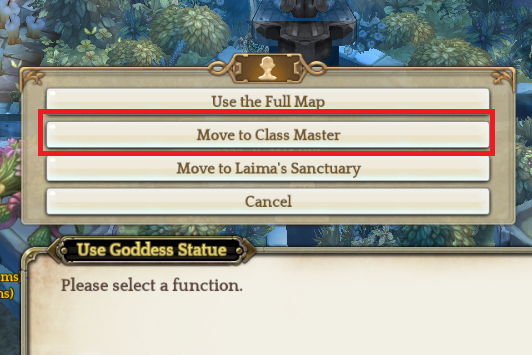
- Approaching a statue of Goddess Vakarine will activate a portal that can teleport you to other regions.
- You can warp freely between statues of Goddess Vakarine in different regions for a silver fee.
- When you pray to the statue, you can move to the Master NPC of the class you advanced
- Worshipping a statue of Goddess Zemyna will give your character a one-time 1 Status Point.
7. Quick slots
- Quick slots are used to register items, skills, and ON/OFF attributes that can then be accessed via shortcut keys.
- To lock your quick slots, click the [lock] on the left. Click it again to unlock the quick slots.
- With your quick slots locked, you will be unable to remove items, skills, and ON/OFF attributes or register new ones.
- You can click the [+] and [-] buttons to expand or minimize your slots. The interface will display a maximum of 4 rows, 40 quick slots in total.
8. Dual Weapon
- There are two weapon slots, the first and the second, and the Weapon ATK/Shield DEF increases according to the slot used.
- When the weapon is equipped in both slots, the ATK/DEF is the average of the weapons in slots 1 and 2 and the attribute that requires a certain weapon is applied by 50% each.
> Skills that require equipping a certain weapon will be available when at least one is equipped in either slot.
| Class | Detail |
| Swordsman | - Dash Movement Speed +10 - Dash is not removed when hit during Dash - Dash available when riding the Companion |
| Wizard | - Dash Movement Speed +6 |
| Archer | - Dash Movement Speed +10 - Dash is removed when hit during Dash |
| Cleric | - Dash Movement Speed +10 - Stamina consumed -50% when Lycanthropy: Human Form is applied |
| Scout | - Dash Movement Speed +13 - Stamina consumed +100% |
- Dual Slot is only applied for Goddess Rank gears. Weapons of all ranks can be equipped in the first slot but the Goddess Rank weapon can only be equipped in the second slot when the Goddess Rank Weapon is already equipped in the first slot.
- When there is a weapon in the second slot, only the Goddess Rank weapon can be equipped in the first slot.
- The order of equipping weapons in the Dual Slot is [Slot 1] Main Weapon > [Set 1] Sub Weapon > [Set 2] Main Weapon > [Set 2] Sub Weapon. When one weapon in the second slot is removed, the other is automatically removed along with it.
- When both the Main/Sub Weapon is equipped in both slots, the fixed/random stat, enchant, and awakening of the second slot is applied. All 8 enchant stats are applied but if there are multiple stats of the same kind, only the highest value will be applied.
- When equipping the shield in the first and second slot, Attack decreases, and Defense increases.
- The main weapon of the Scout class is Dagger and Pistol, and the sub-weapon is One-handed Sword. (Shield is equipped in the sub-weapon)
※ Because the main weapon of the Scout class changed to Dagger and Pistol, they are inflicted by [Physical Attack] instead of [Sub-Physical Attack], which is deleted.
※ [Subweapon attack damage increase] stat is removed from the Enchant stat and [Damage increase when attacking with the main weapon] stat is added.
- When the duration of Disarm, Peacemaker: Disarm debuff is over, the removed equipment will automatically re-equip.
- Block Rate is applied differently according to the item equipped and the [Block Grade] affects the Final Block Chance value.
- Block Chance is applied completely when the value of [Block Grade] reached the highest value(+2). (50% applied per Block Grade +1)
- When the class that can deal with basic attack while moving in PvP zone equips the shield, Movement Speed decreases by 2 when Running Shot, Limacon buff is applied.
|
Effect
|
Block Grade | |
| Equip Shield | First Slot Only | Block Grade +2 |
| First+Second Slot Shield x1 | Block Grade +1 | |
| First+Second Slot Shield x2 | Block Grade +2 | |
| Skill - Cross Guard (Overdrive Arts included) |
Equip Two-handed Sword x1 or One-handed Sword+Dagger x1 in the first slot |
Block Grade +2 |
| Equip Two-handed Sword x1 or One-handed Sword+Dagger x1 in the first+second slot |
Block Grade +1 | |
| Equip Two-handed Sword x2 or One-handed Sword+Dagger x2 in the first+second slot |
Block Grade +2 | |
| Skill - Dagger Guard | Dagger x1 in the first slot | Block Grade +2 |
| First+Second Slot Dagger x1 | Block Grade +1 | |
| First+Second Slot Dagger x2 | Block Grade +2 | |
| Arts - Fencer: Parrying Dagger | Dagger x1 in the first slot | Block Grade +2 |
| First+Second Slot Dagger x1 | Block Grade +1 | |
| First+Second Slot Dagger x2 | Block Grade +2 | |
| Attribute - Kabbalah Garments | Equip 4 parts of cloth armor | Block Grade +1 |
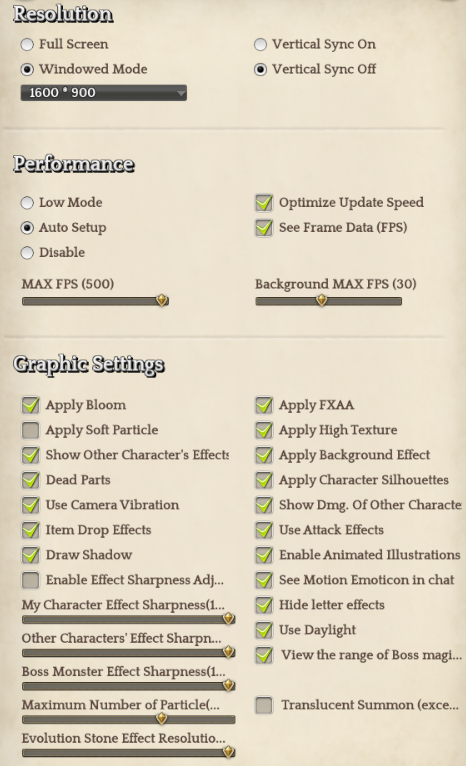
Game Setting
- You can check and change the settings of the window, sound, and UI from the [ESC> Game Setting].
[Game Setting Window]
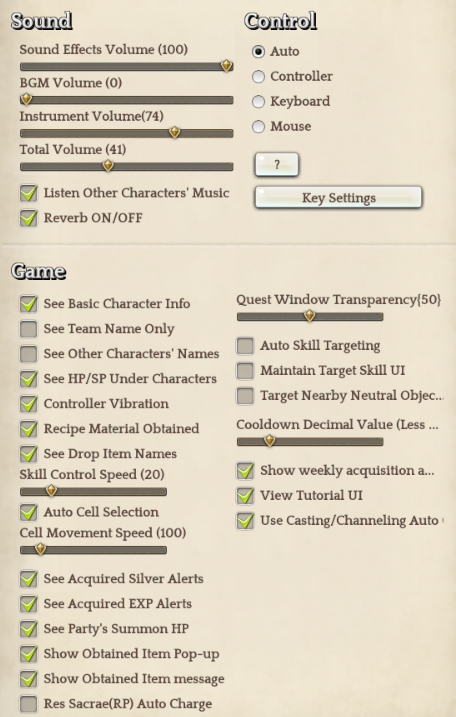
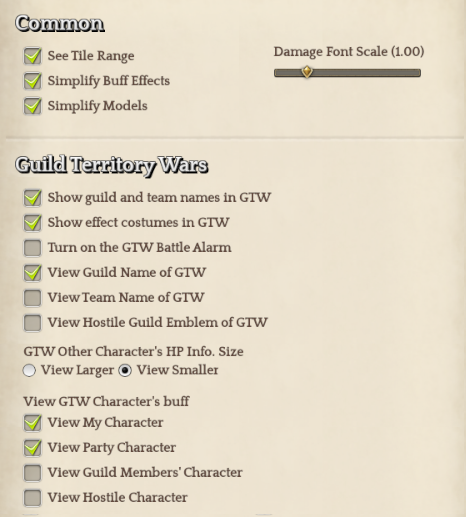
- Change the way of controlling the character via Control.
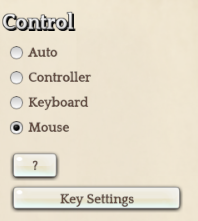
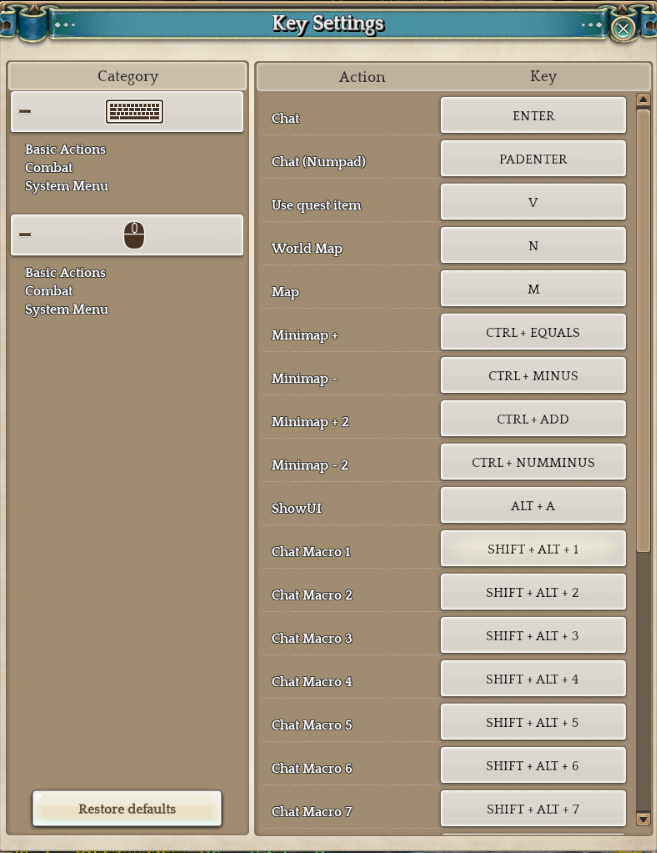
(1) Key Setting
- You can set the key to use during Keyboard/mouse mode.
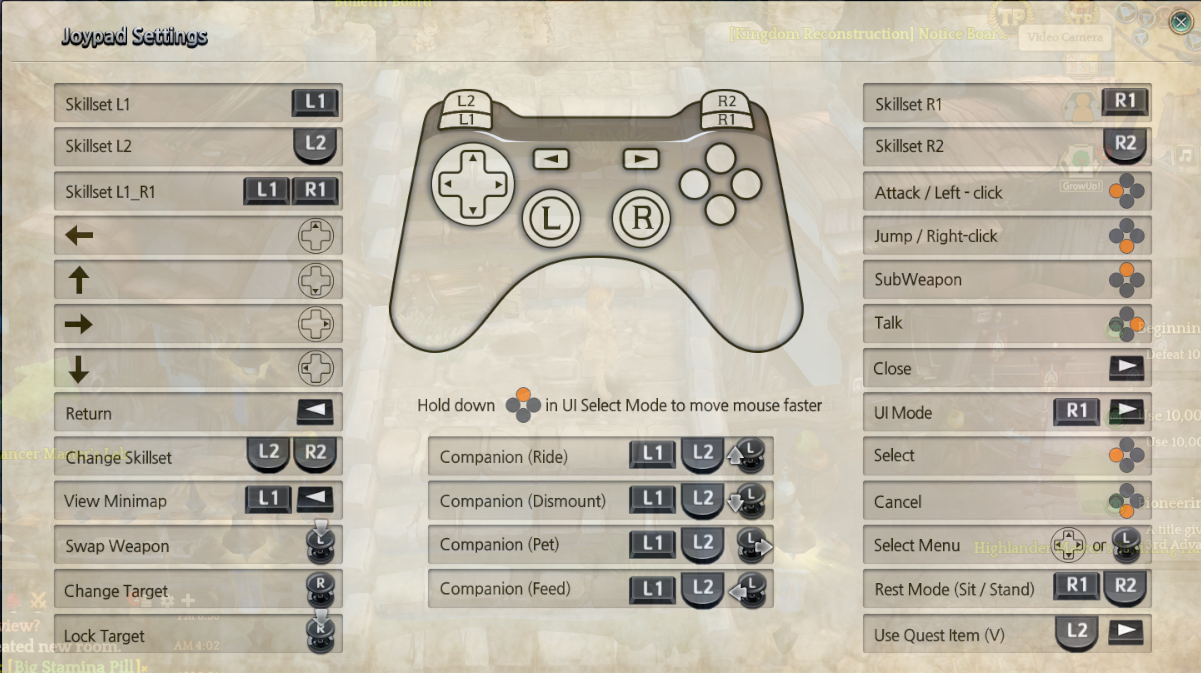
(2) Joypad setting
- You can check the settings of the Joypad Keys by clicking the ? button next to the Joypad.
Screenshot
- Press the Print Screen(Prt Sc) at the top right of the keyboard and take screenshots of the game.
- The screenshots will be saved in the screenshot folder of the game download file.
- Press alt + a key to turn the screenshot mode ON/OFF.
- All UI will be hidden during Screenshot mode and this function can be used during mouse mode as well.
※ The content above is subject to updates and modifications.