Search article

DEVELOPER'S BLOG
[BGM] Guillotina Tristeza - Composed by SFA
Greetings, Saviors! Today we would like to introduce you to our new soundtrack for the upcoming Episode 12 update! Enjoy! Guillotina Tristeza ㆍMusic Produced by S.F.A : Sevin (Composer) ㆍArranged by Coca ㆍLyrics by Sevin, Kazing, SungHa ㆍVocals : Adriana Figueroa https://www.youtube.com/user/adrisaurus ㆍCoordinator : SungHa Hong ㆍMixing & Mastering : Sevin(S.F.A) ㆍMusic Published by IMCGAMES Co., Ltd. Prelude)) To those who don't follow death Corruption and misery will haunt you To those who don't follow destiny Catastrophe, destructed world will rule Verse1)) (If I) fall down someone else will find me From the depth I try not to believe Any tales in the past would just bring me back into sorrow Verse2)) If I wake up, time will tell my fate Keep your eyes on everything you do Today, like empty wind, would just bring me back into sorrow Pre-chorus)) Several dreams gonna fade out true All the truth is being scraped away First time we’re in this world I pray for the moon and the stars Please give me a hand in this agony Chorus)) The sun goes down, the moon rises from the dead Deep sleep from lips above fly away The light is gone, the dark rules in the end No one’s gonna change the world Who can do? It's you
Update Preview Pt. 3: Hunting Grounds & Field Boss
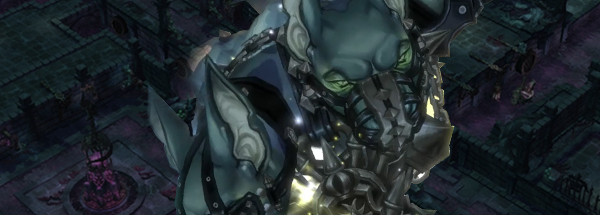
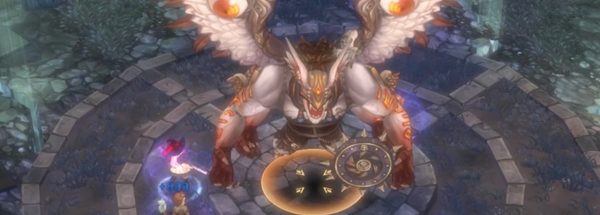
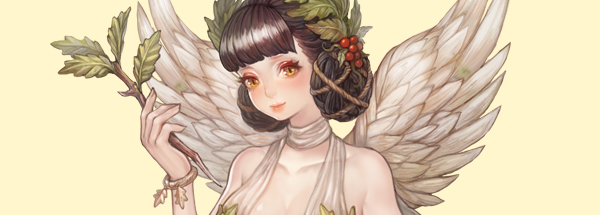
Greetings, Saviors. Today we would like to introduce you two more updates coming your way! - New Hunting Grounds: Outer Wall Sewers - New Field Boss and Field Boss Reward Changes - Click here for Update Preview Pt. 1: Arts System (Link) - Click here for Update Preview Pt. 2: Guild Housing & Legend-grade Equipment (Link) Outer Wall Sewers (Recommended Level: 400) In a time when the Kingdom was prosperous, its people flocked towards the Kingdom's Capital in search of gold and glory. To accommodate the shift in population, King Taniel the First had commissioned the building of the Kingdom's sewer system. The Kingdom's sewer systems were constructed by the finest architects the Kingdom had to offer along with the help of the Kedora Merchant Alliance over the course of many years. The Outer Wall Sewers is one of the many different areas present in the Kingdom's sewer system and was built specifically to provide clean water for the soldiers guarding the Kingdom's outer walls. While most the Kingdom lay in ruins after Medzio Diena, the Outer Wall Sewers remained miraculously intact. Some survivors had taken refuge in the depth of the sewers with the oncoming demon invasion but no one knows what has become of them. Just as the remaining people were starting to forget about its existence, the Outer Wall Sewers is discovered once again by adventurers. With this, the Savior ventures into the wretched sewers, drawn by the loathsome screams of terrible beasts that lie within. Venture and find out what secrets remain locked away in the depths of the Outer Wall Sewers. Lv. 420 Hunting Grounds Boss Misrus Lv. 420 boss monster Misrus The new Lv. 400 Hunting Grounds has a special area that is sealed away and cannot be entered by normal means. This is the Misrus' chamber where it silently awaits the arrival of its next prey. You can enter the boss area through the Chamber Entry Device, and you will be prompted to choose a difficulty upon entry. Defeating Misrus will yield different amount of rewards depending on the difficulty. Misrus is a two-headed dog created by the powers of the Demon King. It viciously attacks anyone that approaches with its ceaseless Psychokinesis and Poison-property attacks. Without the suppressor, Misrus' attack grows even more fierce. Misrus has its power repressed by the Suppressor Device built by the Chesha who live in the sewers. The Suppressor loses its efficacy after a certain duration and Misrus' power grows, making the fight even more difficult. Use the various objects scattered around the Outer Wall Sewers to gain an advantage in the battle against Misrus. Boss Challenges Challenges available while fighting Misrus Players can take part in challenges while battling Misrus. After defeating Misrus, players will be able to obtain a single Outer Wall Sewers Legend Cube and Spirit Fragment: Misrus in equal amount to the successfully completed challenges. Misrus Spirit Fragment You can obtain the recipe for new Unique gear by collecting Spirit Fragment: Misrus Players will be able to obtain an Outer Wall Sewers Legend Cube when defeating Misrus. This cube will contain either a Unique equipment recipe, Magic Stone, Spirit Fragment: Misrus, Misrus Card, Enraged Misrus Card or Misrus' Chain, which is an ingredient used in crafting the new Misrus gear. Outer Wall Sewers Rewards and New Set Stats New Set Stats and Ingredient Along with the new Set Stats available with the new Misrus Unique gear, Misrus' Chain item will be added to be used as an ingredient in adding Set Stats to your new equipment. Atikha Passive effect. [1/x] damage on up to 10 enemies within 60 range when critical attack occurs where x is the number of enemies affected (Cooldown: 8 sec). Dragon Strength Lv. 1: Increases the damage of the effect by 100% Proverbs Increases your damage limit to 1,999,999. 20% additional damage is dealt when damage is over 999,999 (Duration: 25 sec, Cooldown: 100 sec). Dragon Strength Lv. 1: Increases the additional damage effect to 30% Liris Grants a buff to all summons that causes them to deal additional damage equal to the damage dealt against targets (Duration: 30 sec, Cooldown: 100 sec). Dragon Strength Lv. 1: Duration increased by +15 sec. Outer Wall Sewers Location and Entry The Outer Wall Sewers is located in the Outer Wall District 14 area. The entry device can be located in the southern part of the map. Players can complete the gimmick related to the Chamber Entry Device within the Sewers map to enter the Chamber where Misrus dwells. Misrus' Chamber can only be entered through the Chamber Entry Device. Players can obtain Lv. 400 Unique-grade recipes by defeating Lv. 420 Misrus. The ingredients used in crafting this new equipment can be obtained by defeating the Lv. 400 monster in the area. Misrus shares its entry count with the bosses in Irredian Shelter. The entry count for Irredian Shelter bosses will be reset when the new Outer Wall Sewers Hunting Grounds is added. New Field Boss Demon Lord Moringponia Moringponia is one of the most influential Demon Lords under Baiga's command. Many Schaffenstar members guarding the Outer Walls have met their ends at the hands of Demon Lord Moringponia. She reigns supreme over her demon army in the Northern Parias Forest with an iron fist. Demon Lord Moringponia: Blessing of the Goddess Event Unlike the other Field Bosses, rewards that come from defeating Moringponia can be obtained even if you had not participated in defeating the boss. Once Moringponia is defeated, the Blessing of the Goddess Event is held, which all players can participate in. The Blessing of the Goddess Event is held to celebrate the downfall of the evil Demon Lord Moringponia. All participating users can donate a certain amount of Silver for a chance to receive the rewards that are dropped when the Demon Lord is defeated. The Silver spent in participation is distributed among the top 5 parties that have contributed to defeating the Demon Lord. This event is ended when either 5 minutes have passed or 2 Legend-grade equipment is distributed to participating players. Demon Lord Moringponia: New Rewards Reward List Moringponia Headdress Storage Case Moringponia Unqiue Weapon Selection Box Mystic Encyclopedia: Swordsman Vol. 1 Moringponia Unique Armor Selection Box Mystic Encyclopedia: Swordsman Vol. 2 Recipe – Morningponia Headdress Mystic Encyclopedia: Swordsman Vol. 3 Mystic Page Mystic Encyclopedia: Wizard Vol. 1 Goddess Support Box: Punishment Mystic Encyclopedia: Wizard Vol. 2 Goddess Support Box: Protection Mystic Encyclopedia: Wizard Vol. 3 Goddess’ Blessed Gem Mystic Encyclopedia: Archer Vol. 1 Mystic Encyclopedia: Archer Vol. 2 Mystic Encyclopedia: Archer Vol. 3 Mystic Encyclopedia: Cleric Vol. 1 Mystic Encyclopedia: Cleric Vol. 2 Mystic Encyclopedia: Cleric Vol. 3 Mystic Encyclopedia: Scout Vol. 1 Mystic Encyclopedia: Scout Vol. 2 Mystic Encyclopedia: Scout Vol. 3 Moringponia Set Stats Aqkrova Casts a red spell circle. The Attack of all allies within the magic circle is increased by 30% and they also recover HP equal to 0.1% of damage dealt (does not stack, Duration: 10 sec). Final damage received by caster reduced by 50% (Duration: 100 sec, cannot be removed). Dragon Strength Lv. 1: Ally attack increase effect raised to 50% Skidas Passive effect. Creates a shield around the caster when an enemy is defeated. Shield amount: 60% of target’s max. HP (Duration: 30 sec, Cooldown: 10 sec). Dragon Strength Lv. 1: Shield amount increased to 100% of target’s max. HP. Atagal Returns received damage in amount equal to DEF value of the equipped shield (Duration: 50 sec, Cooldown: 100 sec) Dragon Strength Lv. 1: Physical DEF value is increased to 160% of the equipped shield’s DEF value. Field Boss System Overhaul The following changes have been made to the game's Field Boss system in order to make Field Bosses more accessible to the general player base. Before After Spawn Interval Between 4 – 8 hours 4 hours Spawn Location Demon Lord Demon Lord Rexipher Demon Lord Helgasercle Demon Lord Marnox Outer Wall District 9 Inner Wall District 9 Inner Wall District 8 City Wall District 8 Jeromel Park Jonael Memorial Inner Wall District 8 Demon Lord Nuaele Demon Lord Zaura Demon Lord Blut Emmet Forest Pystis Forest Syla Forest Mishekan Forest Emmet Forest The lower level Field Bosses always had been first-come-first-serve, which lead to an unbalanced distribution of Field Boss rewards among the player base. Because of this, we have decided to remove the lower level Field bosses and merge their rewards with the remaining Field Bosses in the game. However, this would cause the drop rates of certain items to be much too low for certain items that are deemed more vital to the gameplay. These items are planned to be included as rewards in other contents that the game provides in the near future. * All features showcased above are works in progress and are subject to change with future developments.

Update Preview Pt. 2: Guild Housing and Legend-grade Equipment
- Part. 1: Arts System (Link) - Part 2: Guild Housing and Legend-grade Equipment - Part 3: Hunting Grounds & Field Boss (Link) Guild Housing 1. Introduction Guild Housing is a new casual content planned to be added in Tree of Savior where players can decorate their Guild Hangout using various knick-knacks. It also provides different methods by which players can develop their Guild for more Guild-oriented activities within the game. 2. Contents Players can now customize their Guild Hangout with decorations and add research facilities to earn extra in-game benefits through the Guild. Decorations - Guilds that have expanded their Hangout over Lv. 2 can purchase Housing decorations and related facilities through the Hangout Manager NPC. - Purchased goods can be placed in the Guild Hangout as decoration. <Purchasing of Decorations> There are 4 different Guild Housing Points available that you can use various decorations and facilities that can be installed in the Guild Hangout. Housing Points displayed in the [Hangout UI] Housing items can be purchased from the Hangout Manager NPC and they will be provided to the players as items placed in their character’s inventory. Various housing items available at the Guild Housing Shop A Guild Housing Item <Edit Mode> When your Guild Hangout is at Lv. 2 and above, you will be able to access the Edit Mode where you can place various housing decorations and facilities by clicking on the house-shaped icon to the bottom-left corner of the minimap. Edit Mode icon available in the Guild Hangout With Edit Mode activated, you will be able to install, move and remove various housing objects and facilities. A player installing a bench Guild Laboratory With the Guild Hangout Level at 3 or above, you will be able to install laboratories to conduct in the various fields of research that grant benefits to your Guild members. <Weapon Laboratory> Purchasing and installing a Weapon Laboratory can provide the following benefits. Research Effect Special Weaponry - Plant Increases damage against Plant-type enemies Special Weaponry - Insect Increases damage against Insect-type enemies Special Weaponry - Beast Increases damage against Beast-type enemies Special Weaponry - Mutant Increases damage against Mutant-type enemies Special Weaponry - Devil Increases damage against Devil-type enemies <Armor Laboratory> Purchasing and installing an Armor Laboratory can provide the following benefits. Research Effect Cloth Armor - Material Reduces damage from monsters in proportion to number of equipped cloth armor Leather Armor - Material Reduces damage from monsters in proportion to number of equipped leather armor Plate Armor - Material Reduces damage from monsters in proportion to number of equipped plate armor Cloth Armor - Function - Increases SP recovery in proportion to the number of equipped cloth armor - Grants chance for additional SP recovery in proportion to the number of equipped cloth armor every 20 sec Leather Armor - Function - Increases the maximum STA in proportion to the number of equipped leather armor - Reduces the cost of STA while dashing in proportion to the number of equipped leather armor Plate Armor - Function - Increases HP recovery in proportion to the number of equipped plate armor - Grants the chance for additional HP recovery in proportion to the number of equipped plate armor every 20 sec <Property Laboratory> Purchasing and installing a Property Laboratory can provide the following benefits. Research Effect Theory - Fire Increases the effect of additional Fire-property damage Theory - Ice Increases the effect of additional Ice-property damage Theory - Lightning Increases the effect of additional Lightning-property damage Theory - Poison Increases the effect of additional Poison-property damage Theory - Dark Increases the effect of additional Dark-property damage Theory - Holy Increases the effect of additional Holy-property damage Theory - Earth Increases the effect of additional Earth-property damage Theory - Psychokinesis Increases the effect of additional Psychokinesis-property damage Guild Laboratories can be expanded by using Guild Funds and Guild Mileage. The levels of laboratories can be increased through this process and the efficacy of the research results also increase with level. Laboratory Expansion UI Research levels can be increased through the Laboratory UI by investing Guild Funds. Laboratory UI The effects of research can be activated either for an individual member through the use of Guild Contribution points or for the whole Guild by spending Guild Funds. Effects activated for individual players only apply 50% of the effects. * Effects earned through Research is not applied in PvP environments. Individual and Group activation buttons Others <Crafting Workshop> Crafting Workshops can be added started from Guild Hangout Lv. 2 by using Guild Funds and Guild Mileage. Building a Crafting Workshop will also raise the maximum Housing Points that can be accumulated. We will also be adding items exclusive to the Crafting Workshop and more will be revealed with future updates. <Guild Farm> Players will also be able to grow crops in the Guild Hangout after reaching Hangout Lv. 2. * A single plot of farmland will be provided to the Guild inventory once the Guild Hangout level reaches 2. Additional farm plots can be purchased through the Hangout Manager and using the farm plot item will let you place the plot in any possible location of the Guild Hangout. * A maximum of 2 farm plots can be placed. Farming changes in the following ways when Guild Hangout Lv. 2 is reached. Guild Hangout Level Farming Method Lv. 1 Use seeds on pre-existing farm plots within the Hangout. Lv. 2 - Install farm plot items in desired locations - Use seed items on installed farm-plots Players will be able to purchase the Farm Manager NPC Contract from the Housing Shop. Having the Farm Manager NPC will give the Guild various bonuses in farming. We are planning to develop and introduce new farming related contents and systems in the future that we will reveal to you with future dev blog posts. <Guild Shop> A Guild Shop will be added and players will be able to purchase various items through the Hangout Manager NPC. Items can be purchased using Contribution Points at the Guild Shop Legend-grade Equipment In our earlier dev post, we have mentioned that we will increase the means for which our players will be able to obtain end-game equipment. We wanted to make Legend-grade equipment available to farm from each of the game’s different content in order to increase the ways in which the different types of players can enjoy the game. However, we have also come to acknowledge the fact that the current equipment upgrade system in Tree of Savior is plagued with a more fundamental problem where the myriad customization options available make the farming process overly fatiguing and hinders player enjoyment. So we have decided to head towards a different direction than previously announced. A flowchart of the current equipment system in Tree of Savior In the game’s current state, the addition of new gear causes more worry than intrigue for players. To alleviate the issue to a certain extent, we have decided not to add any more new “prefixed” gear during the current Episode other than the already existing Savinose Legva and Skiaclipse Varna gear. All rewards obtainable from the upcoming content additions will be either ingredient for equipment set stats, Unique-grade equipment or other core rewards such as talt, silver, shards, etc. New set stats that can be added using these ingredients will be applicable to both Savinose Legva and Skiaclipse Varna equipment. With the aforementioned changes, we hope to increase the accessibility for our Legend-grade equipment and also relieve the players from the stress that comes with upgrading their equipment. The ingredients obtained from Field Bosses and Solo Raids can be used to apply set stats on both Savinose and Skiaclipse Varna equipment. However, the set stats unique to each type of Legend-grade gear will not applicable to the other. Equipment Savinose Legva Skiaclipse Varna Basic Set Stats Rykuma Smugi Corup Goduma Bendrinti Gymas Apsauga Field Boss Set Stats Applicable for both equipment Solo Raid Set Stats Applicable for both equipment Equipment Customization Remnants of Bernice Remnants of Bernice dungeon currently provides players with Enchant Jewels as a reward but the amount of time and effort required to obtain one through the content far surpasses the item’s current market value due to the randomness of monster placement and other problems. We have decided to implement two major changes to Remnants of Bernice in order to resolve this issue which are: - To fix the monster-type of boss monsters that appear - To increase the weekly rewards obtainable through the content Golden Socket Golden Sockets are items that let players add a socket to their equipment regardless of the item’s remaining potential. Adding sockets to one-handed weapons are relatively cheap while adding a fourth or fifth socket to a two-handed weapon can cost players up to 20,000,000 silver. To combat this, we will be drastically reducing the cost of adding sockets through the use of Golden Sockets. Content Changes Increased Rewards Remnants of Bernice Enchant Jewel cost reduced (Unit: Remnants of Bernice Coins) Rare: 90 -> 40 Unique: 200 -> 150 Legend: 4500 -> 1200 Cost Reduction Golden Sockets Socket addition fee reduced 300% -> 100% * All features showcased above are works in progress and are subject to change with future developments.
Update Preview Pt. 1: Arts System
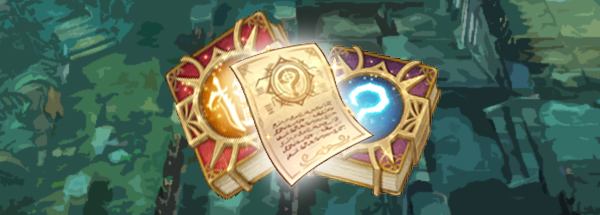
Greetings, Saviors! Today we would like to introduce to you three new features that will be added to the game in the future. - Part 1: Arts System - Part 2: Guild Housing & Legend-grade Equipment (Link) - Part 3: Hunting Grounds & Field Boss (Link) Arts System 1. Introduction The Arts System is the system through which the hidden potentials to player character’s skills can be unlocked. They will be made available in the form of tomes. The tomes that contain these “Arts” are named [Mystic Tomes] and there are different tomes specific to different Arts. After having obtained an Art, the Art will be bound to your character as an attribute. Mystic Tome Skill and Attributes UI with the [Thrust: Charge] Art [Thrust: Charge] in use 2. Mystic Tomes In order to obtain a [Mystic Tome], you will be required to collect multiple [Mystic Tome Pages]. [Mystic Tome Page] is a single page of the Mystic Tome that can be collected to create a [Unidentified Mystic Tome], which is a service provided by each of the game’s Class Masters. 1. [Mystic Tome Page] A page from a [Mystic Tome]. Collect multiple pages to create an [Unidentified Mystic Tome] item. - Cannot be traded between players - Can be sold on the Market - Can be transferred via Team Storage 2. [Unidentified Mystic Tome] An [Unidentified Mystic Tome] containing a secret Arts that has been handed down over the years. Use to obtain one [Mystic Tome] - Cannot be traded between players - Cannot be sold on the Market - Can be transferred via Team Storage Different [Unidentified Mystic Tomes] exist for different classes. [UPDATE] You can choose the Mystic Tome of your desired class. [Unidentified Mystic Tomes] for different classes [Unidentified Mystic Tome: Swordsman] [Unidentified Mystic Tome: Wizard] [Unidentified Mystic Tome: Archer] [Unidentified Mystic Tome: Cleric] [Unidentified Mystic Tome: Scout] 3. [Mystic Tome] Use to obtain a specific Arts. There are different Arts that can change a skill’s property or form, enhance skill efficacy or even Arts to enhance an existing Art. - Cannot be traded between players - Cannot be sold on the Market - Can be transferred via Team Storage * The Arts introduced below are all works in progress and are subject to change with future development. [Mystic Tome (Corrida Finale: Burning Bull)] The trail of the charging bull is set ablaze. Adds fire-property to Corrida Finale and applies fire damage to the designated area for a 5-second duration. [Corrida Finale: Burning Bull] [Mystic Tome (Ice Wall: Magic Igloo)] Ice Wall is turned into an igloo when there are 6 or more walls and the starting point of the ice wall connects to the endpoint. Grants immunity to [Freeze] debuff and reduces damage received from ice-property attacks while inside the igloo. Also heals the caster’s HP by an amount equal to the caster’s HP recovery value every second. [Mystic Tome (Bounce Shot: Instant Freeze Arrow)] Adds ice-property to Bounce Shot and grants 100% chance to [Slow] targets. Damage increases with less number of targets. [Bounce Shot: Instant Freeze Arrow] [Mystic Tome (Cloth Mastery: Communion) (Sadhu only) Increases the additional psychokinesis-property damage effect by 10% of the player’s Magic Attack and grants [attribute level]x0.2% chance to grant immunity to debuff (rank 3 and below) when wearing 4 sets of cloth armor. [Mystic Tome (Knife Throwing: Zenith) Knife Throwing skill is cast in a circular shape around the player. 3. Obtaining and Dismantling [Mystic Tomes] Mystic Tome Crafting UI (WIP) 1. Crafting an Unidentified Mystic Tome You can use [Mystic Tome Pages] to craft an [Unidentified Mystic Tome] through the different Class Masters in the game. Crafting an [Unidentified Mystic Tome] through a Class Master requires [Mystic Tome Pages] and [Goddess’ Blessed Gems]. 2 [Mystic Tome Pages] and 10 [Goddess’ Blessed Gems] are required to craft a single [Unidentified Mystic Tome]. 2. Crafting a Class-specific Unidentified Mystic Tome You can also craft a [Class-specific Unidentified Mystic Tome] by visiting a Class Master that you want. A Class-specific [Mystic Tome] requires a greater number of [Mystic Tome Pages] and [Goddess’ Blessed Gems] than an [Unidentified Mystic Tome]. For example, you must visit the Swordsman Master NPC in order to craft a [Unidentified Mystic Tome: Swordsman] and use additional amounts of [Mystic Tome Pages] and [Goddess’ Blessed Gems]. 3. Mystic Encyclopedia As you can see above, obtaining a specific Art via [Unidentified Mystic Tomes] is hard work. [Mystic Encyclopedia] is a reward item that grants easier access to Mystic Tomes for players. [Mystic Encyclopedia] is more costly to craft but it is advantageous in that you can obtain the Art you want from by using it. [Mystic Encyclopedia] Use to obtain a [Mystic Tome] of your choice. - Cannot be traded between players - Cannot be sold on the Market - Can be transferred via Team Storage Mystic Encyclopedia consists of different volumes containing different [Mystic Tomes]. For example, [Mystic Encyclopedia: Swordsman Vol. 1] and [Mystic Encyclopedia: Swordsman Vol. 2] consist of different Mystic Tomes and their contents do not overlap between volumes. [Mystic Encyclopedia: Swordsman Vol.1] contents [Mystic Encyclopedia: Swordsman Vol.2] contents 4. Dismantling a [Mystic Tome] You can also dismantle [Mystic Tomes] into [Mystic Tome Pages]. Dismantling yields less number of pages than it took to craft a Tome but at times it can be preferable to get your used pages back than to earn Silver from them. Mystic Tome Pages and Chance from Dismantling Mystic Tome Page x1 Mystic Tome Page x2 Mystic Tome Page x3 70% 20% 10% * All features showcased above are works in progress and are subject to change with future developments.

Attention All Returning Saviors!
Greetings, Saviors! TOS has undergone extensive changes since the arrival of our Re:Build update and still continue to change to this day. So we have prepared a comprehensive guide for all Saviors returning to the game after a long hiatus. Have a read to see all the new features that you may be missing out on! SYSTEM CHANGES 1. Class Level / Equipment / Attribution Points - All characters’ Class Levels have been reset and the Class EXP of all characters have been refunded as [Class EXP Recovery Cards], which can be found in your character’s [Market Retrieve] tab along with the character’s previously equipped items. - All invested Attribute Points have also been refunded so you can re-invest them to suit the changes made to different class’ skills. 2. Instance Dungeon Usage Report - Entry counts for instance dungeons will now be displayed on the [Instance Dungeon Usage] UI for each of your characters in your Team Lodge. - The Instance Dungeon Usage window displays the remaining entry counts for each of the instance dungeons for each of your character from the moment of your character’s last log-in. - Please take note that the entry counts displayed here will not be automatically updated unless you log-in with the specific character. 3. Quest UI [F5] - You can now better sort your available quests using the new quest view filter and also choose which quest objectives you want to be displayed by ticking the box to the left of the quest list. Previous Quest UI / New Quest UI 4. Exclusive Rookie/Returning Savior TP Shop - You will be able to gain access to the exclusive Rookie/Returning Savior TP Shop if your account is new, or you do not have a log-in history for over a 30-day period. - The Rookie/Returning TP shop is available for a 30-day duration from the moment you first log-in or the moment return to the game. CONTENT CHANGES - PVE 1. Level Dungeon The entry requirement for Level Dungeons have been streamlined to levels 50, 130, 200, 270 and 330. PROTIP Level Dungeon cubes will now only drop [Talt] and [Monster Cards] of boss monsters. Other items previously available from Dungeon Cubes can be acquired by hunting field monsters instead. 2. Uphill Defense You can now enter the Uphill Defense mission 4 times a week. - Uphill Mission now has two difficulty modes available to choose from: Normal and Hard. Completing the Uphill Defense mission in Hard difficulty will reward players with more Uphill Defense points and higher grade Gem Abrasives. Difficulty Reward Normal 5-Star Gem Abrasive x2 Hard 6-Star Gem Abrasive x1 - Players no longer have to retrieve rewards for every stage they clear and instead be rewarded after the mission has ended. - The entry count for Uphill Defense mission will only be deducted when the mission is over (either complete or failed), at the point which you can claim your reward from [Sister Lhasa] Uphill Defense Entry Count will be deduct once the Uphill Defense is over (cleared or failed), and you can retrieve clear reward from [Sister Lhasa] NPC. 3. Remnants of Bernice Dungeon The participation reward for Remnants of Bernice Dungeon has been changed. Before After Dimensional Potion Remnants of Bernice Coin - The Remnants of Bernice Point Shop has been added and can now be accessed through the [Oracle Master] NPC in Klaipeda where you can spend your Remnants of Bernice Coin to obtain various reward items. 4. Challenge Mode - Challenge Mode can now only be entered when in a party and there is also a 10-party entry limit per channel. - If you or all other party members abandon a party during Challenge Mode, the Challenge Mode will end and you will not be able to re-enter the Challenge Mode session you were participating in. - Entry Count is only deducted after your rewards have been obtained and the items and EXP points will be issued all at once after the Challenge Mode has been ended. - Note that you will not be able to receive any rewards when failing a Challenge Mode session and your entry count will remain unchanged. - Players can now randomly obtain [Recipe - Legend Raid Portal Stone] by completing the Challenge Mode up to stages 6 and 7. PROTIP [Legend Raid Portal Stones] are items that grant you additional entry to Legend Raids after your weekly entry counts have been used up. 5. Earth Tower - Earth Tower is now divided into 4 Lolopanther and 4 Solmiki areas. You can now freely choose which area of the Earth Tower you want to enter. - Players will no longer be able to obtain Silver for defeating Earth Tower bosses and Lolopanther bosses will no longer reward players with Symbol items. CONTENT CHANGES - PVP 1. Gemstone Feud - The level required for entering Gemstone Feud is now 300. - You will be allocated into a random Gemstone Feud session regardless of the area you’ve entered from and will be returned to the city in which you entered the Gemstone Feud session. Entry Time Feud Time Session 1 21:10~21:15 EDT 21:10~21:25 EDT Session 2 21:30~21:35 EDT 21:30~21:45 EDT - Bonus [Mercenary Badges] are now issued to top 5 ranked players in a session but players will not be able to receive Mercenary Badges if they have failed to gain at least 10 points. - The points earned by defeating the boss monster will not be added to the player’s individual points. 2. Borutos Kapas - Borutos Kapas is a GvG raid where you and your Guild must fight against opposing Guilds in a free-for-all battle to bring down the terrible Dragon Boruta. - Borutos Kapas sessions are open daily from 22:00 ~ 02:00 server time in Sulivinas Lair, which can be accessed through the Kupole Kaze NPC in Vedas Plateau. - Each Team is given a 1-hour entry limit per day and will be automatically returned to Vedas Plateau after their 1-hour duration is over. - The 1-hour entry limit begins counting down once the player enters Sulivinas Lair and the duration count is continued even while the player is outside of Sulivinas Lair. - Players will be returned automatically to Kupole Kaze in Vedas Plateau when failing to select a respawn point for a 30-second duration after becoming incapable of combat Guild Rewards Individual Rewards - Rewarded to the top 5 Guilds with the highest contribution points. 1) Shining Boruta Cube 2) Boruta Seal (random class) - Participation rewards can be obtained by earning individual contribution points. - Special rewards are given to players with the top 30 individual contribution points. 1) Boruta Cube 2) Medal of Honor: Boruta CONTENT CHANGES - Equipment 1. Ichor Transmutation - Ichor Transmutation is a system that lets players extract Ichors with a 100% chance. - The success rate of the Transmutation process depends on the potential of the items used as ingredients. - If you use 3 items with full potential, the success rate will be 100%. - Failing the transmutation process will destroy all items used as ingredients. - Using 3 different items will yield a random Ichor from one of the 3 items used for the transmutation. Transmutation Requirement: Magic, Rare, or Unique items of Lv. 350 and above. Location: [Teliavelis] NPC in the city of Fedimian Required Items: [Ichor Transmutation Kit], [Sierra Powder] 2. Unequipping Ichors - Players can now remove equipped Ichors from items. - The bonus stats from Ichors will also be removed from the item and Ichors will be extracted into their original forms. Location: [Teliavelis] NPC in Fedimian Cost: [Item Level x 10,000 Silver] 3. Awakening - The new [Awakening Abrasive] item has been added to the game. - You can gain higher stat bonuses when an [Awakening Abrasive] is used to Awaken an item. [Lv.400 Awakening Abrasives] can be randomly obtained by hunting monsters in fields or in Challenge Modes. [Locations] Barynwell 27 Waters Maven 31 Waters Maven 32 Waters Northern Parias Forest Central Parias Forest Southern Parias Forest Inner Wall District 10 Outer Wall District 11 Outer Wall District 13 Outer Wall District 14 Outer Wall District 15 * Locations in gold are accessible through Goddess Statue warps. 4. Item Set Stats - Players can use the [Pamoka Solution] to add set stats to Velcoffer or Savinose set equipment. - Adding set stats to items now has a 100% success rate as long as you have the required number of Pamoka Solution. Purchasable from: [Alchemist Master Vaidotas] NPC in the Miner’s Village NEW CONTENT 1. Guild Hangout Raid - Players can now participate in the Guild Hangout Raid through the Sage Envoy NPC who appears in the Guild Hangout once a Guild reaches Guild Level 5. - Players will need to be the Guild Master or be given the authority by the Guild Master in order to start the Guild Hangout Raid. - Silver can be claimed as the raid reward from the Sage Envoy NPC and can be earned in amounts proportionate to each player’s accumulated contribution. - The total amount of Silver acquirable is dependent on the Guild level and contribution rank. 2. Hunting Grounds - Irredian’s Shelter - New Lv. 390 Hunting Grounds has been added in the northern area of Spell Tome Town in the [Magija Slove Square] area. - Players can defeat a certain number of monsters to open a portal leading to a boss monster for a Solo Raid. - The Solo Raid can be played 5 times per week per Team. 3. Tomb of the White Crow: Unique Raid Name Tomb of the White Crow: Unique Raid Entry [Shadowmancer Master] NPC at [Rasvoy Lake] Level Requirement Character Level 400 Cost Raid Portal Stone x6 - Players must complete the prerequisite Lv. 400 quest [From a Mistake to a Threat] before being able to participate in the Tomb of the White Crow raid. - Each additional entry consumes 1 extra Raid Portal Stone and the amount of Raid Portal Stones required is reset every Monday at 6 AM server time.
All You Need to Know: The Savinose Gear Guide
Where to Go - Planiums are required to craft the new Savinose equipment and are dropped randomly when you defeat monsters in areas above Lv 390. - Planiums can be acquired from the following areas: Maven 31 Waters (Lv. 390) Maven 32 Waters (Lv. 395) Outer Wall District 11 (Lv. 391) Inner Wall District 10 (Lv. 394) Outer Wall District 13 (Lv. 397) Outer Wall District 14 (Lv. 401) Outer Wall District 15 (Lv. 404) Northern Parias Forest (Lv. 408) Central Parias Forest (Lv. 411) Southern Parias Forest (Lv. 415) How to Get There - The new NPC Pajauta in Fedimian will be providing warps to these new areas, available 5 times per character. - Pajauta will be providing warps to Northern Paris Forest, Outer Wall District 11 and Barynwell 27 Waters. - Pajauta’s warp service can be used after completing the Episode 11 pre-requisite quests given by the NPC. How to Farm - The best way to farm Planiums will be through Challenge Modes. - Challenge Modes are preferred as this is where you can hunt hordes of different monsters unique to the area without having to roam around the map. - Defeating 200 monsters within an area will produce a Challenge Mode portal in the area. - You will be able to acquire new Legva gear and other materials for crafting new Episode 11 items. Challenge Mode Items Challenge Mode One Entry Voucher - Challenge Modes can be entered only once per day per character. Using voucher will allow you to enter Challenge Mode one more time. Challenge Portal Scroll - Using a Challenge Portal Scroll will produce a Challenge Mode portal in the area without having to hunt 200 monsters. Crafting Savinose Gear - The blacksmith Teliavelis in Fedimian will craft Savinose items using the Planiums you have collected. - Planiums Required to Craft Savinose Gear: Weapon/Sub-weapon: x8 Armor (Top/Bottom/Gloves/Boots): x3 Set Stats: Pamoka Solution - Savinose equipment can be given Set Stats that give players bonus item stats or usable skills like Velcoffer gear. - You are required to collect EXP using Pamoka Solutions to apply set stats, which is purchasable from the Alchemist Master Vaidotas in the Miner’s Village. - You must activate the Pamoka Solution item in your inventory by right-clicking on it in order to collect EXP for applying set stats. - The item slot for the Pamoka Solution will light up when right-clicked, confirming that it has been activated. - Number of Pamoka Solutions required to apply Savinose Set Stats: Weapon/Sub-weapon: x26 Armor (Top/Bottom/Gloves/Boots): x8 Pro Tip - Add the Pamoka Solution to your quick slot. - Always remember to right-click the Pamoka Solution before beginning each Challenge Mode or Dungeon run. - Use an EXP Tome for bigger EXP gain. Set Stats: Korup & Rykuma - Set Stats can be applied through the Alchemist Master Vaidotas in the Miner’s Village. - You will be able to choose one of two Set Stats that you want to apply to your gear, which are Korup and Rykuma. Set Stat Details Korup - 3 Set: STR +32, INT +32 - 4 Set: AoE Attack Ratio +3 - 5 Set: Korup’s Decay - Dragon Strength Lv. 1: The following additional effects are applied during the duration of Korup’s Decay - Increased Physical and Poison damage by 10% - Increases the minimum critical rates for Magic and Curse attacks by 20% Rykuma - 3 Set: STR +42 - 4 Set: Movement Speed +3, STA +30 - 5 Set: Grace of Rykuma - Dragon Strength Lv. 1: Increases the duration of Grace of Rykuma by 10 seconds - You will be able to use a new skill when equipped with 5 Savinose items with identical Set Stats. - Using either Korup or Rykuma skills consumes skill items (Riperium and Lensterseum respectively) - Skill items for Set Stat skills can be purchased from the Alchemist Master Vaidotas in the Miner’s Village. - Riperium: Using Korup skill consumes Riperium x1 - Lensterseum: Using Rykuma skill consumes Lensterseum x1 ※ The content above is subject to updates and modifications.
New Unique/Legend Raid Preview
Greetings Saviors, Today we would like to give you a sneak preview of the new Unique/Legend raid, The Tomb of the White Crow. Tomb of the White Crow The Tomb of the White Crow can be entered through the Dimensional Crack that appears after clearing the Shadowmancer’s quest in Rasvoy Lake. It is an area that the Shadowmancer Master Eclipse Ubik had come across accidentally during her studies. Eclipse Ubik had entered the area thinking that she had reached the goal of her studies but a powerful demon had been waiting for her in the area. Feeling threatened, she had sealed away the demon using sealing mechanisms that she had devised and left the area thereafter. But Ubik soon came to the realization that the seal she had laid to bind the demon in place was rapidly weakening over time and she had come to seek the help of the Saviors of the realm in order to seal away the demon for good. Skiaclipse The Tomb of the White Crow is a raid that is designed so that players are in a continuous battle against the raid boss. You will first come across Skiaclipse entrapped by the Shadowmancer Master’s device. But soon he begins to chip away at the seal and regain his suppressed power. Players must protect the Sealing Orbs in this phase of the raid. You try to protect the Sealing Orbs, but Skiaclipse unleashes his power and frees himself from the seal. Skiaclipse is still very powerful despite having lost much of his power while being sealed away. His power grows as the fight draws on. To prevent Skiaclipse from regaining his full power, the devices set in place by the Shadowmancer Master must be activated. Successfully making use of these devices will prevent the demon’s power from growing, but failing to do so will leave the you to deal with the monstrous wrath of Skiaclipse. When weakened to a point, Skiaclipse will begin his frantic last stand against the Savior. Should you be able to withstand his final struggle, you will be successful in sealing the terrible demon away. New Equipment: Unique-level Skiaclipse Series The Unique-grade Skiaclipse series of equipment are special items that can only be obtained through the Tomb of the White Crow raid. They have fixed stats like the items obtained from raids introduced earlier and can be used to extract ichors from as well as worn into battle. And… Just as players begin to grow accustomed to the Skiaclipse raid, the new Legend Raid: Tomb of the White Crow will be made available. The new legend raid will be comprised of bigger, badder and harder gimmicks and reworked Skiaclipse boss monster, as well as new Legend-grade equipment available as a reward. That will be all for the Dev post today. Thank you all for reading!

OUT NOW! The Popolion Post - April 2019 Issue
Greetings, Saviors! The April issue of The Popolion Post is out now! Click the link below or the one in our homepage to read all about the newest content and dev insight. This issue features: - Development Map for 2019 A look into what's in store for TOS this year! - Dev Q&A: Recent Content The devs answer your questions and feedback on the latest content additions! - Coming Up Next: Episode 11 The next big content update and what it brings to the table! - Interview with rjgtav from TOS.GURU TPP's exclusive interview with the creator of the famous fanmade TOS database! - And much more! Click [HERE] to start reading!
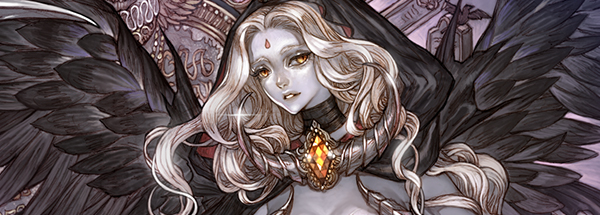
Episode 11: An Introduction
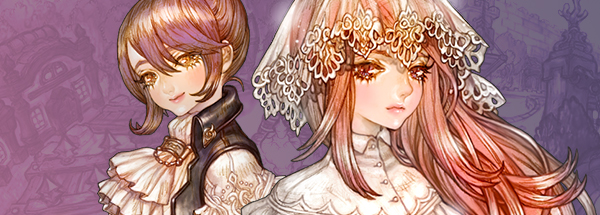
To the Ruins of the New Capital: Episode 11 Taking a departure from the old rank system, the dev team has decided to expand on the TOS world in increments of episodes. The dev team is currently focused on developing the new Episode 11 for TOS and would like to share some of its contents with you, our dear readers. New Quests, New Locations Episode 11 will include 11 new areas, new NPC’s, new monsters and demon lords. The current level cap of 390 will also be increased to 420. The Remains of the Astral Tower The Astral Tower awaits your return. You will carry on the legacy of the Astral Tower alongside the surviving Schaffenstar members and Lakers in Barynwell 27 Waters. The Last Remaining Gateway to The Capital The outer walls that protected the Kingdom’s Capital had worn down following Medzio Diena. The brave soldiers that manned the walls had gone missing and only the wounded survivors remain within the wall’s limits, hidden away from the prying eyes of demons. The story of the Kingdom’s survivors start here at these very walls. The Last Revelation and the Goddess Medeina Despite being under the watchful eye of the Demon King Kartas, the Goddess Medeina has decided to reveal herself to the Savior in order to pass on the Last Revelation. Goddess Medeina The Demon King Kartas is scheming to bring Medeina, the Forest Goddess, under his captivity behind the Demon Goddess Giltine’s back. This story unfolds in the northern regions of Parias Forest. Continued Character Growth through Quests The dev team is aware of the feedback that there should be better ways for the players who want to immerse themselves in the TOS world to level their characters, not having to resort to hunting the fields. We wanted to make completing quests a worthwhile investment for our players by providing equipments and items that will assist their characters in reaching the new level cap. This feature had been implemented previously with the Re:Build update and we will continue to do so with our future updates as well. Pajauta The Guardian of the People Pajauta Pajauta is the new NPC who has saved the people from the wrath of Medzio Diena. Even before Medzio Diena, she had played a major role in the investigation of demon cults and many other problems that plagued the Kingdom behind the scenes. Some had even gone as far as to call her the second coming of Lydia Schaffen, but in the end, she had given up all hopes as the situation in the Kingdom got worse after Medzio Diena. In her moment of despair, she had heard news of the Savior and set out to find you in order to ask for your help in returning order to the Kingdom’s northern regions. The dev team has prepared a prerequisite quest for Episode 11 to help players ease into the new content without too much trouble. You will travel the northern regions of the Kingdom with Pajauta at your side and she will guide you towards the last revelation. The New Raid Boss and the Main Quest New demon lords await you in Episode 11. Players will be able to preview the attack patterns of the new raid bosses while playing through the new quest lines. Demon Lord Moringponia Item Changes in Episode 11 Acquisition of Legend-grade Items Legend-grade items can now be acquired through many different contents. This will reduce the time and effort it takes for players to reach the level at which they can partake in the game’s most densely populated contents. Players will still be required to upgrade their items, but we will now provide a larger variety of ways in which the base items can be obtained. Field Drop Legend-Grade Items Players will now be able to obtain Legend-grade equipment by hunting monsters in the fields. Monsters will drop the materials required in crafting the new Legend-grade equipment and the crafted equipment will be given random stats. The set bonuses will be predetermined and new equipment will be categorized by different attack properties. Raid Bosses, Field Bosses and Hunting Grounds Bosses Contents Raid Boss Field Boss Hunting Grounds Boss Rewards Legend item recipes, tradeable finished items + Unique item recipes, finished unique items Legend item recipes, tradeable finished items + Unique recipes, finished unique items + Field boss accessories Legend item recipes, tradeable finished items + Unique recipes, finished unique items + Seals + Magic Stones Options Ichors Ichors Ichors Set Bonuses 1 of 2~4 types of set bonuses 1 of 2~4 types of set bonuses 1 of 2~4 types of set bonuses Raids The materials required to craft items earned with previous raids had to be earned in the fields. The abundance of the materials was high in comparison to the actual drop rate of the recipes because they could be obtained relatively easily through Challenge Modes, which made the Raids feel more like a grind. The new raids will be developed so that they drop legend recipes, unique recipes and finished legend items that can be traded. Also, the required materials for crafting new equipment from acquired recipes will be reduced to make the process quicker. Field Bosses Field Bosses provide a competitive PvE experience for players. However, they have not been of great importance because of the reward system that is based on the grade of the Field Boss and lacking reward content. We are planning to introduce new Unique ~ Legend grade items as Field Boss rewards with set bonuses that are different from the equipment acquired from general Raids. Hunting Grounds Bosses Seals, magic stones and various tradeable Unique and Legend-grade items will be provided through a 1:1 battle with the Hunting Grounds Bosses. The difficulty of the new bosses will be much higher than the bosses available in Irredian Shelter. In Summary The items below the Unique-grade can be used to extract Ichors, while 2-4 different types of Legend-grade set bonuses will be available for each of the different content. Transcendence, Random Options and Awakening Transcendence of Unique Items Transcendence of items below the grade-level of Unique will be lowered. Players have a difficult time in deciding whether to transcend their Unique weapons or not, since Unique weapons are currently considered to be weapons that will eventually be discarded. Unique weapons will now come pre-transcended. Unidentified items will vary in their initial transcendence level by random and items crafted from recipes will have a set base transcendence level, and, of course, players will be able to invest in these items to transcend them even further. Raids The upper-level raids will have their entry limits increased and have different requirements or rewards to compensate for the changes. For example, if the Velcoffer raid can be entered 2 times per week per team, its reward will be increased by x fold. Not only will the rewards be increased, but the finished items and recipes acquired in the raid will also be made tradeable. The raid rewards will also not be issued via cubes but from treasure chests that players can open after they have defeated the raid boss. Random Stats The maximum values of the random stats that appear upon identification will be increased as well as the increased occurrence of useful options such as increased critical rate. Awakening Rework You can use additional materials at the Alchemist shops to add Awakening bonuses with greater effects. New Item Upgrades New Unique & Legend-Grade Items The level requirement for new items introduced in Episode 11 will be Lv. 400. Set Bonuses and Ichors Set Bonuses Players will be able to pick and choose the set bonuses to be added to the Lv. 400 items. Ichor Transmutation A transmutation system will be introduced for Ichors to ensure that players can get 100% Ichor extraction. Players can use three items of full potential for extract Ichors successfully. The Ichor for one of the three items used will be extracted at random. As in the picture above, there will be a 33% success rate of Ichor extraction if the total sum potential of the three items are 13/39, and if the sum potential for the three items are 39/39, the player will have a 100% chance of extracting one random Ichor belonging to one of the three items used. Ichor Transfer A new system will also be added that lets players unequip Ichors from items that have already been equipped to legend-grade items. It will consume silver but there will be no probability involved in the process. This new system will be introduced on the same date with the new legend raid equipments. Legend Raid Entry Limit Following the update, all legend raid entry limit will be set to 5 times per week. All rewards will be adjusted accordingly and players will also be able to obtain Legend Raid Portal Stones from the 6th and 7th stages of Challenge Mode, which will require a regular Raid Portal Stone to be crafted. Legend Raid Portal Stones will grant players entry to Legend Raids(Earth Tower, Velcoffer, etc.) after they have used up their 5 time entry limit for the week. Legend Raid Portal Stones will not be useable with newly introduced content. The application of Legend Raid Portal Stones will be expanded with subsequent updates. Class Tree Abilities With the introduction of new classes, special abilities for each of the class trees will be readjusted. These class-specific abilities are chosen to be skills that will help each class survive in battle. Swordsman - Pain Barrier 100% resistance to status ailments will be added to Pain Barrier. The duration of the status ailment resistance buff will be kept separately from the knockback/knockdown immunity. Wizard - Teleportation Psychokino’s Teleportation skill will be moved to the Wizard class. Archer - Leap Mergen’s Jump Shot skill will be moved to the Archer class and its attack will be removed. Cleric - Cure Cure skill’s maximum level will be increased. Scout - Cloaking The skill can no longer be used while the player is in combat, and movement speed will be increased while under the Cloaking buff. New Classes New classes will be added with the Episode 11 update. The newly added classes will be Tiger Hunter and Matross classes for the Archer tree and Ardito and Sheriff classes for the Scout tree. Archer Tree Tiger Hunter The new Tiger Hunter class uses the musket as their main weapon and its attacks have bonuses against beast-type enemies. Piercing Shot [Lv. 1] Fires piercing bullets against the enemy in rapid succession. Inflicts additional damage against beast-type enemies. Piercing Shot: Enhance Increases the skill factor of Piercing Shot by 0.5% per attribute level. Tracking [Lv. 1] Adds a buff that lets you dash during combat. Also increases the stamina cost of dashing. Tracking: Duration Increases the duration of the Tracking buff. Tracking: Hunting Season Adds the Prey debuff to target when attacking an enemy while under the Tracking buff at a chance proportional to the attribute level. Prey debuff shares the same duration with the Tracking buff and all Tiger Hunter skills used on the debuffed enemy will gain a bonus equal to attacking a beast-type monster. - Piercing Shot: Damage increased by +50% - Rapid Fire: Critical rate increased by +30% - Ambush: 50% chance to stun enemy Rapid Shot [Lv. 1] Rapidly fires at the targeted enemy. Each shot is ricocheted off the target and has increased chance of landing as a critical hit against beast-type monsters. Rapid Shot: Enhance Increases the skill factor of Rapid Shot by 0.5% per attribute level. Eye of the Tiger [Lv. 16] Adds the Death Stare debuff to enemies within a designated area. Enemies with the debuff receives increased damage from the player for one attack. If the enemy survives the attack with the debuff, the player will receive additional damage from the targeted enemies. Ambush [Lv. 16] Quickly approaches the targeted enemy to attack. Beast-type monsters have a chance to become stunned when targeted. Ambush: Enhance Increases the skill factor of Ambush by 0.5% per attribute level. Ambush: Knockback Causes the enemies hit by Ambush are knocked back. Camo Shot [Lv. 13] Tiger Hunter gains a Camouflage buff that hides him/herself from the enemies. There is a chance that the buff could be removed every time Tiger Hunter attacks. Camo Shot: Advantage Increases the player’s STR and DEX proportional to the attribute level when an enemy is killed while under the Camouflage buff. Camo Shot: Grasslands Using Camo Shot on areas with grass increases the duration of the skill. Matross Matross is a class that uses cannons whose specialty is utilities and offers the player increased mobility, buffs and debuffs. Fire and Run [Lv. 1] Aims the cannon at the player’s feet and fires to fly backward in recoil. Fire and Run: Enhance Increases the skill factor of Fire and Run by 0.5% per attribute level. Fire and Run: Reduce Recoil Reduces the distance covered by Fire and Run by half and increases the damage inflicted on the enemy. Explosion [Lv. 1] Shoots at the targeted enemy, causing a circular explosion around the targeted enemy. Explosion: Enhance Increases the skill factor of Explosion by 0.5% per attribute level. Explosion: Chain Reaction Gives the chance to cause more explosions on enemies hit by the skill’s explosion effect according to the attribute level. Menace Shot [Lv. 1] Shoots the cannon skywards to cause panic to enemies around the player, rendering them temporarily inactive. Menace Shot: Enhance Increases the skill factor of Menace by 0.5% per attribute level. Menace Shot: Achilles Heel The cannon damage received by enemies while under panic increases according to the attribute level. Crouching Strike [Lv. 16] Slams the cannon on the ground to damage enemies near the player. Enemies are knocked down in place upon being hit. Crouching Strike: Enhance Increases the skill factor of Crouching Strike by 0.5% per attribute level. Crouching Strike: Remove Knockdown Removes the knockdown effect of Crouching Strike. Crouching Strike: Stun Gives a chance to stun enemies hit by Crouching Strike according to the attribute level. Roar [Lv. 16] Gives a buff that increases the player’s AoE ratio. Roar: Critical Reduces the AoE ratio increased by Roar by half but increases the critical rate of the player. Canister Shot [Lv. 31] Fires a cannonball that draws enemies closer for a certain duration. The cannonball explodes once the duration is over to inflict damage on enemies within its range. Canister Shot: Enhance Increases the skill factor of Canister Shot by 0.5% per attribute level. Canister Shot: Remove Knockdown Removes the knockdown effect of Canister Shot. Canister Shot: Duration Increases the duration of the cannonball according to the attribute level. Scout Tree Ardito Ardito is a class that specializes in close-quarters combat using the dagger and continuous damage using grenades and molotovs. Granata [Lv. 1] Throws a grenade towards a designated area to attack the enemy. Granata: Enhance Increases the skill factor of Granata by 0.5% per attribute level. Tre Granate [Lv. 1] Throws a molotov towards a designated area to attack the enemy. Tre Granate: Enhance Increases the skill factor of Tre Granate by 0.5% per attribute level. Tre Granate: Lingering Flames Enemies who have left the effect area of Tre Granate will continue to to take fire damage for a duration proportional to the attribute level. Ritirarsi [Lv. 1] The player leaps backwards after dropping a grenade in place. Ritirarsi: Enhance Increases the skill factor of Ritirarsi by 0.5% per attribute level. Recupero [Lv. 16] The player injects a syringe on self to recover HP and Stamina. Recupero: Enhance Increases the skill factor of Recupero by 0.5% per attribute level. Invasione [Lv. 16] Attacks the enemy in front by stabbing them. Invasione: Enhance Increases the skill factor of Invasione by 0.5% per attribute level. Taglio [Lv. 31] Dashes forward and slashes at the enemy in the way. Enemies are knocked down and gives a temporary movement speed boost to the player. Taglio: Enhance Increases the skill factor of Taglio by 0.5% per attribute level. Taglio: Remove Knockback Removes the knockback effect of Taglio. Sheriff Sheriffs are a class that wields the pistol as a main weapon and specialize in focusing its damage on single enemies. All Sheriff skills can be used while being mounted. Quick Draw [Lv. 1] Draws the pistol to attack the target quickly. Quick Draw: Enhance Increases the skill factor of Quick Draw by 0.5% per attribute level. Fanning [Lv. 1] Fires 6 consecutive shots from the pistol at a single target. Fanning: Enhance Increases the skill factor of Fanning by 0.5% per attribute level. Westraid [Lv. 1] Reloads the pistol to give a buff that makes the player’s attack hit the mark at a 100% rate for a specified number of attacks. Peacemaker [Lv. 16] Throws an explosive at the targeted enemy. The target is disarmed and cannot wield its weapon for a duration. Peacemaker: Enhance Increases the skill factor of Peacemaker by 0.5% per attribute level. Redemption [Lv. 16] Gives the buff that lets the player dodge all attacks for a duration and increases movement speed. Redemption: Escape Increases the movement speed gain by two-fold and reduces the duration of the buff by half. Aiming Shot [Lv. 31] Fires an undodgeable shot into an area. Targeted enemies will have a specified number of buffs removed and receive additional damage according to the number of removed buffs. Aiming Shot: Enhance Increases the skill factor of Aiming Shot by 0.5% per attribute level. Aiming Shot: Coup de Grace Reduces the number of buffs removed by Aiming Shot to 1 while increasing the skill factor. * The above information is currently in development and is subject to change before the release date.